Introduction:
Bond bridges are probably best thought of as a form of glue or adhesive which ensures the paving elements (the flags, setts or whatever) are well and truly stuck like the proverbial to the laying course . It is sometimes known as slurry coat, primer, priming slurry, and quite a few alternative terms that are best left on the building site.
It's also a very useful technique for ensuring elements such as wall copings , pier caps and even step treads stay put and don't become loose.
The application of a suitable bond bridge or primer coat is also proving to be a very effective barrier to the migration of moisture and mineral salts through relatively porous stone, such as many sandstones and granites, and so minimises the risk of the appearance of disfiguring reflective staining.
With the growing use of permeable bedding mortars, the application of bond bridges has become even more important in ensuring the paving stays put once laid.
Over recent years, it has become more or less 'standard practice' to use a bond bridge when laying flagstones, setts and other small pavers onto a cementitious bed. There are a host of convoluted reasons why this has come about but the key factors seem to be:
- The shallow nature of many modern pavings which has resulted in there being less mass to keep the pavement in situ
- The increased use of imported stone, some of which is exceptionally permeable/impermeable or just plain awkward
- The increased reliance on BS 7533: Parts 4 (flags) and 7 (setts) which steers designers towards using fully bound construction where the paving units are little more than a decorative finish to a cementitious (or " Hydraulically Bound " as they now like to refer to it) monolithic slab.
Pros and Cons
Advantages:
There are genuine advantages to using bond bridges, especially on commercial pavements which may be subject to vehicle traffic. There are fewer incidents of loose paving elements, which is the main aim of the bond bridge, but there is also, allegedly, fewer examples of moisture staining and picture framing, although much of this is purely anecdotal.
Bond bridges are also useful for DIYers who may not be familiar with the idiosyncrasies of cement-based (oops! Hydraulically Bound, that is) bedding. When laying a residential driveway or patio, the bond bridge can help ensure sound adhesion, something that is not always achieved by non-professionals when laying imported sandstones , limestones, granites, slates and the like.
In fact, some materials, such as slate and porphyry, are notoriously difficult when it comes to getting them to bond to the bed, so a bond bridge is often essential to avoid loose or rocking flags.

And the value of a good quality bond bridge or primer coat in preventing reflective staining should not be underestimated. As the types of stone being used grows with each passing year, there is a growing proportion of relatively porous stone being used that needs an impermeable barrier to prevent unsightly migrtaion of moisture and minerals.
Finally, the rapid growth in the use of porcelain or ceramic or vitrified paving has made the use of a Bond Bridge more or less essential. Like the slates and porphyries mentioned above, these materails are practically impermeable and so it can be difficult to achieve good adhesion between flag and bedding, so more-or-less every quality supplier of porcelain now insist that their paving be coated with a Bond Bridge (primer coat or slury seal) prior to installation.
Disadvantages:
While use of a bond bridge can undoubtedly make for a better pavement on completion, there are a small number of drawbacks that should be considered before committing to their use.
Cost:
This will vary depending on just what product is used, but using a bond bridge adds to the material cost of a pavement. This might be a few pennies per square metre for a simple 'home made' recipe bond bridge, to several tens of pennies for some of the proprietary brands. It might not sound a lot for the benefits gained, but it all adds up and when working to a tight budget, it may be one of the items that has to be carefully examined to justify its use.
Cleanliness:
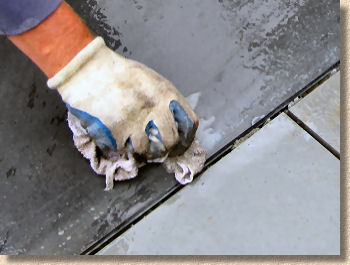
The purpose of a bond bridge is to stick. It sticks to the underside of the paving and it sticks to the bed. It will also stick to any tools that are used, to hands, gloves and other clothing, and to unprotected surfaces that are accidentally splashed. Great care is needed to ensure that the jollop only goes where it is actually needed. Any spills or splashes absolutely must be cleaned off immediately, usually with clean water. Once this stuff sets, it is there for life. Far too many otherwise beautiful pavements are spoiled because the contractor did not clean off while working, mistakenly believing the stain or snot would come off during final cleaning.
Remedial work:
Occasionally, for all sorts of reasons, paving elements that have been laid need to be taken up. It may be that they are spalled or broken, they may have been stained with oil or some other contaminant, there might be pipes, cables or ducts beneath that need attention, or they just might have been badly laid to an incorrect line or level. Whatever the reason, taking up a paving element that has been laid using a bond bridge can be extremely difficult. It's not just difficult to prise the element(s) up from the rest of the paving, it is usually all but impossible to separate the paving from the bedding, making re-use impractical.
In many cases, paving is sacrificed. It is literally smashed out and thrown away rather than wasting time trying to salvage and re-lay. When the paving involved is 15 quid per square metre patio sandstone, this might not be too much of a sacrifice, but when it's some fancy imported stone costing 200 quid or more per square metre, it makes you wonder whether using the bond bridge was such a good idea!
How to use:
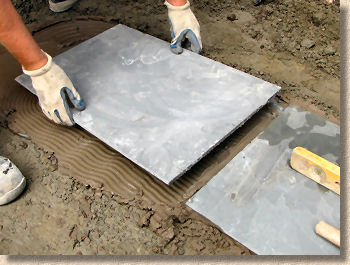
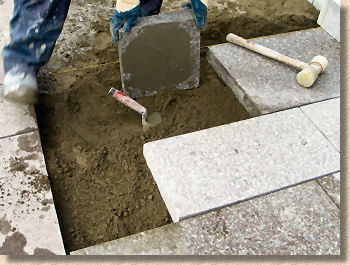
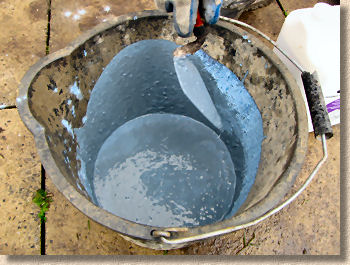
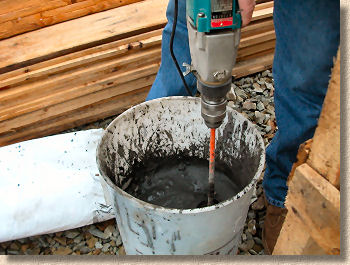
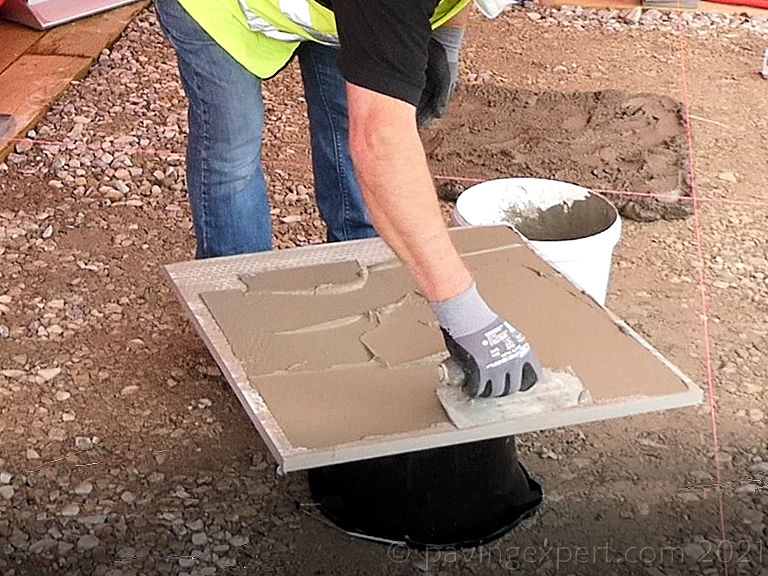
Bond bridges are typically applied as a slurry or paste to the underside of the paving element. The concoction is prepared to a thick, soup-like consistency, a small amount at a time.
The bed face (underside) of the paving unit should be brushed or washed first to remove any dust or detritus and ensure a clean surface for the slurry/paste.
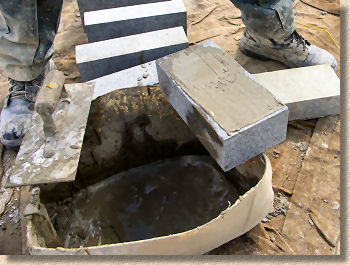
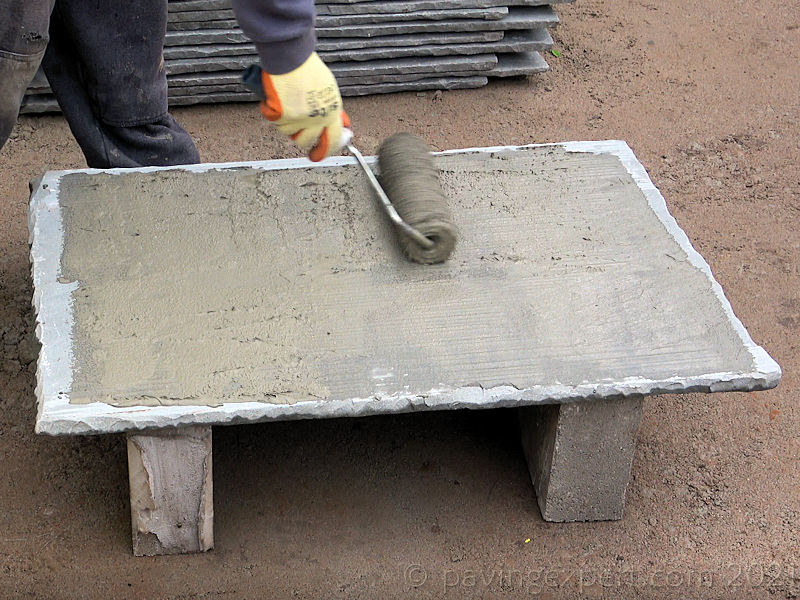
The resulting jollop may be painted onto the underside using a soft brush, a roller, or Turk's head (are we still allowed to call them that?), or it may be trowel-applied, much like tiling adhesive (some contractors like to use a notched tiling trowel). When working with smaller units such as setts, cubes and cobbles, the element may have its base dipped into the slurry.
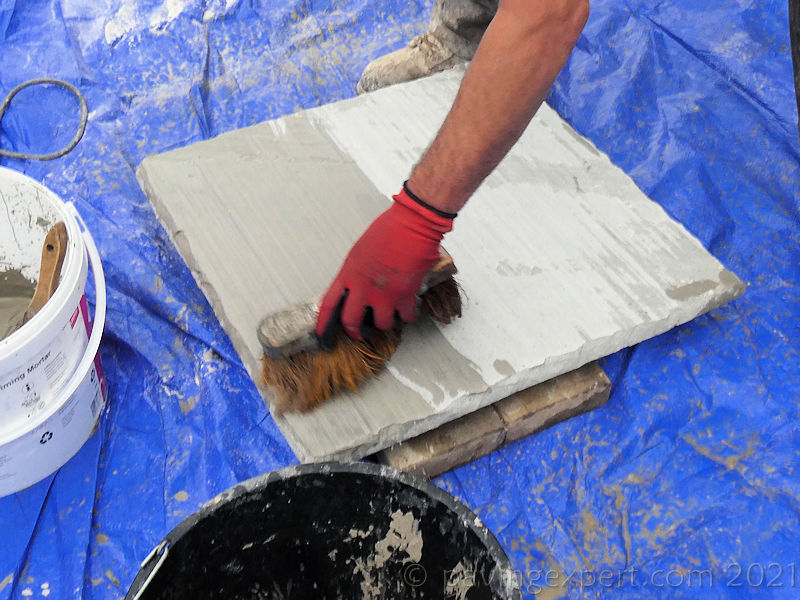

However it is applied, care is required to avoid contaminating other materials, tools or the wider working area. The slurry/paste should be roughly 1-2mm thick when applied. A thin smear is not adequate.
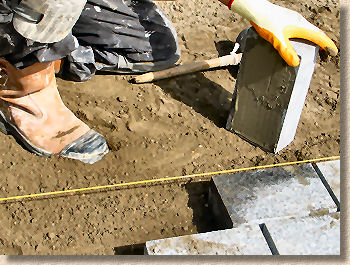
The element is then laid as per normal, with the treated face placed down onto the prepared laying course bed. Once consolidated down to the required level, it's good practice to check the paving for any spills or splashes and clean them off immediately before moving on to the next unit. It can be scary to witness just how bloody quick this stuff can set, especially in summer!
What to use:
There are a growing number of proprietary products that are little short of miraculous, if you believe all of the hype put out by the manufacturers. There's also a tendency for manufacturers of proprietary laying course material to insist on their slurry product being used to ensure full compatibility. A cynic might think that it is profit rather than compatibility that is the primary concern in such cases, but perhaps that's being too harsh.
To be fair, the better-known names amongst the proprietary primers and bonding mortars are often very good. They are required to comply with a minimum performance level, which should give a degree of reassurance to both installers and clients, but more importantly, they provide consistency. The slurry used on Monday morning is exactly the same as that used on Friday afternoon. There's far less risk of some inattentive labourer messing-up mix ratios or adding too much water.
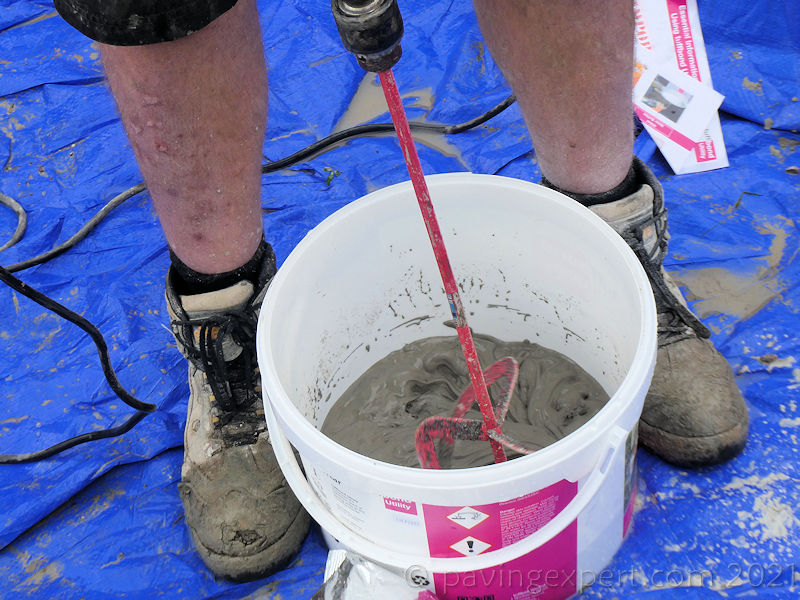
For smaller projects, a lower-cost alternative is to make a slurry using readily available ingredients. The most popular recipe uses nothing more than liquid SBR (3-5 quid per litre) with ordinary Portland cement (5-6 quid per 25kg). A small quantity of the SBR (100ml or so) is placed into a bucket and then dry cement powder is slowly added and stirred in until the desired consistency is achieved.
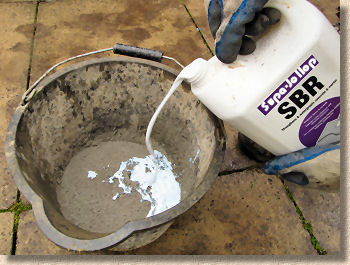
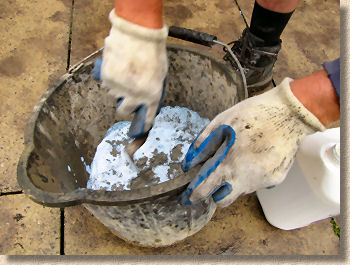
Experience shows that adding powder to liquid results in fewer lumps of unwetted cement (a bit like making custard) although doing it t'other way round, by adding liquid to powder has no effect on the end product. Different strokes for different folks and all that!
The problem with the "home made" primers is that pesky word yet again: consistency. Not all SBRs are equal: some achieve what are referred to as 'cost savings' by means of simple dilution, so 100ml of a top brand might be 20-50% more effective than 100ml of a budget brand.
Then there's the cement content. In Britain and Ireland we are reasonably lucky in being able to assume with some certainty that all bagged portland cements are of a minimum standard - it's not always the case in other parts of the world - so that's one thing less to worry about, but it's the quantity of cement to be added. What guarantee is there that the mix made in the morning has the same ratio of SBR to cement powder as that prepared after lunch? The good installer will carefully measure out both components, but far too many rely on a splosh of SBR to a dash of cement, and that's where the inconsistency arises.
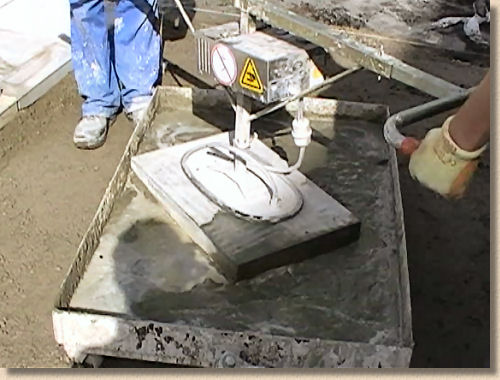
On commercial projects where vacuum lifts are used to move larger and heavier flags, it's usually simpler to have a large tray or bath of prepared bond bridge slurry into which the underside of the flag can be dipped just prior to placing.
Trowel and roller applications normally use a thicker consistency (think of cake batter) than brush-on or dipping applications (think soup).
Note that when using a 'home made' slurry primer where the paving elements are particularly light in colour or prone to absorption, it might be better to use a white cement rather than an ordinary Portland as this will minimise any risk of discolouration.