Introduction:
There are two acceptable methods of laying flags - individual bedded and screed bedded. There are other methods, spot-bedding, ring-bedding, and ribbon-bedding but these are not considered suitable for any professional paving project. The choice of laying methods depends on the personal preference of the contractor/specifier, the type of bedding that is chosen, and the types of flags being used.
When stone flags are laid to town centre footpaths and other areas that are open to the general public, the rigid laying method is used increasingly. While this method is not radically different to that outlined below, it is important enought to warrant its own page where the methodology is illustrated in more detail.
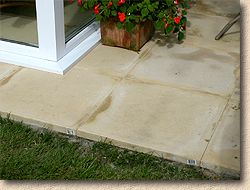
Flagged driveways also have particular requirements which are considered on a separate page
Bedding Methods
Individual bedding
This method relies on each flag having a bed prepared for it individually. A bed is prepared, the flag is laid and then the next bed prepared and so on. See How (further down page).
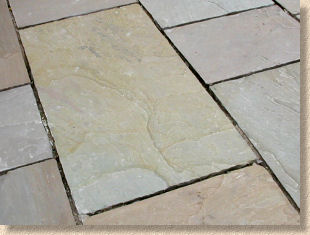
This method is more commonly used with larger flags, where handling and manoeuvrability is a major concern, with natural stone flags, where there can be significant difference in flag thickness between adjacent units, and for many of the mould cast riven or decorative flags, which tend to have a variable thickness ranging ±15mm on individual units - this being a result of the mould not being perfectly level when the wet-cast concrete is allowed to set.
Screed Bedding
This method requires a screed bed to be prepared before placing the flags. A relatively large area can be screeded in advance and the flags placed one after the other directly onto the bed. See How (further down page).
Whilst obviously more efficient than the individual bedding method, this method is only suitable for the smaller flags, generally those less than 600x600mm, which are small and light enough to be man-handled onto a screeded bed, although it can also be used with some calibrated flagstones .
Read more about how calibrated flagstones are manufactured
Where screeded beds are perfectly flat (ie: no change of plane), flags of almost any size could be laid, but where there are changes in fall or multiple planes, only the smaller flags can normally be used, as larger units would rock when seated onto a non-flat bed.
It is essential that the flags be of a constant thickness, hence the small element paving flags, wet-press manufactured patio flags and the smaller calibrated stone flags are the most suitable candidates.
Spot Bedding
British Standard 7533: Part 4 , which covers the installation of both concrete and natural stone flags or slabs, requires that these are laid on a "full bedding layer". This applies to ALL classes of pavements, including patios and driveways, not just the big projects undertaken in the town centre or on a retail park.

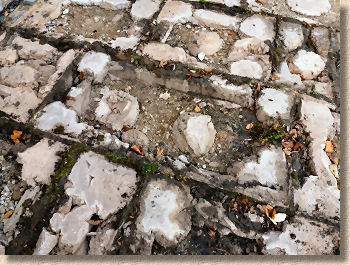
Regardless of what you may have seen on TV DIY and Gardening programs, spot bedding is not an acceptable bedding method because...
- it leaves voids beneath the flags, making them more likely to fracture when loaded
- the voids can allow surface water to accumulate, leading to subsidence or instability
- the voids provide a ready-made home for invertebrates, particularly ants, which love to mine an unbound bedding material and/or sub-grade
- the solidified mortar spots settle differently causing the flag to 'rock' when trafficked
- correcting any rocking flags requires the old mortar to be broken out and disposed
- it is often more expensive than solid bedding
- it often results in damp patches appearing on porous flagstones, especially sandstones
- it does not comply with the relevant Code of Practice (BS7533:Part4) which requires bedding to provide "uniform support".
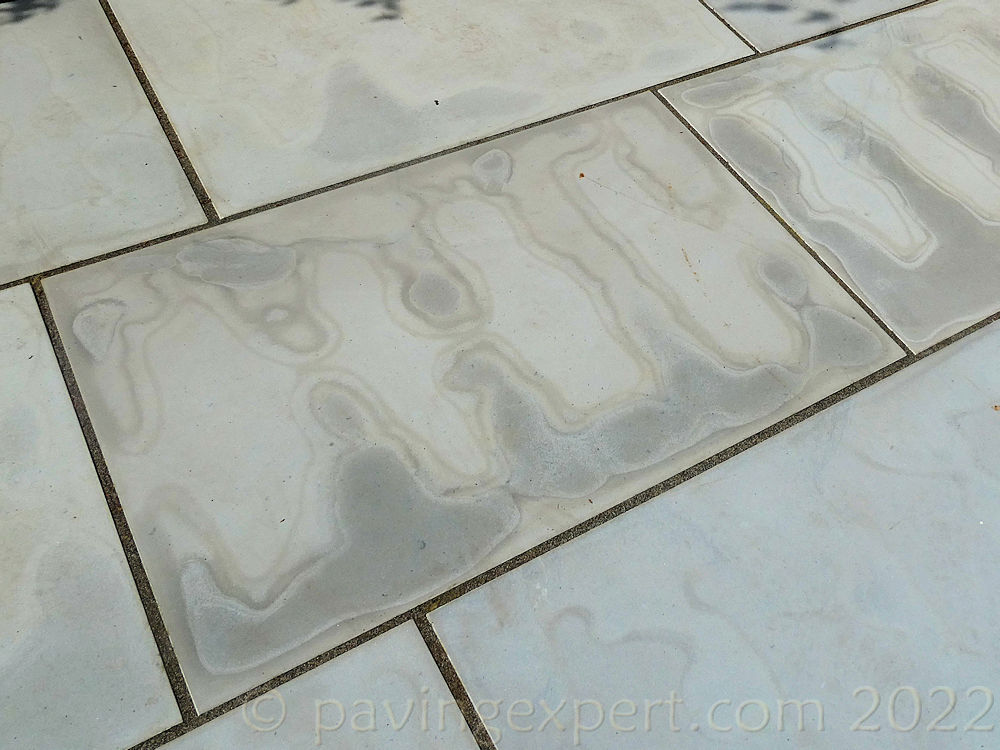
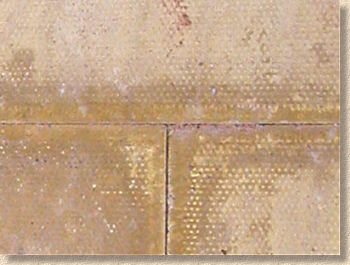
Find out what causes this type of staining on the Reflective Staining page.
When asked to inspect a flagged pavement which is troubled by a large percentage of rocking and/or broken/spalled flags, in over 70% of cases, we have found that spot-bedding is the prime cause of the problems.
The two most common faults we encounter are lost bedding, because the voids left between the mortar spots provide a channel into which surface/ground water can enter and wash-out the bedding and/or sub-grade material, and excessive breakages because the flags are not evenly supported across their entire base.
Whilst we can accept that these problems are less likely to occur on a small residential patio, we cannot and will not endorse spot-bedding as a suitable method for laying flags, regardless of the location. Some publications may depict spot-bedding as an acceptable methodology for DIY projects, because it makes flag-laying appear simple, but for a professional contractor or anyone keen to do the job correctly it should never, ever, ever be considered. Ever!
Don't expect any sympathy from this website if you use spot-bedding and it turns out wrong!
Ring Bedding:
A variation on the unacceptable spot bedding is ring bedding. As with spot bedding, it often reveals itself by means of distinctive discolouration or staining on the surface of the flagstones a few weeks after they have been laid.

Ring bedding is defined as a "ring" of mortar being placed around the perimeter of the flagstone with, sometimes, a central dollop which the idiots involved believe improves support.

Once again, this form of bedding does NOT provide the "full bedding layer" required in BS 7533:4 . It is a partial bed. It has voids, hollows, gaps….call them what you will. It is NOT a full bed, therefore it is NOT acceptable, on any class of pavement, whether it’s a high street or a patio.

Ribbon Bedding:
A further variation that is equally unacceptable is "Ribbon" bedding. This nefarious technique relies on three or four 'ribbons' of the mortar, usually running parallel to the short axis of the flags, with significant gaps between. There may be a couple of additional ribbons at the top and lower end of the long axis, too.
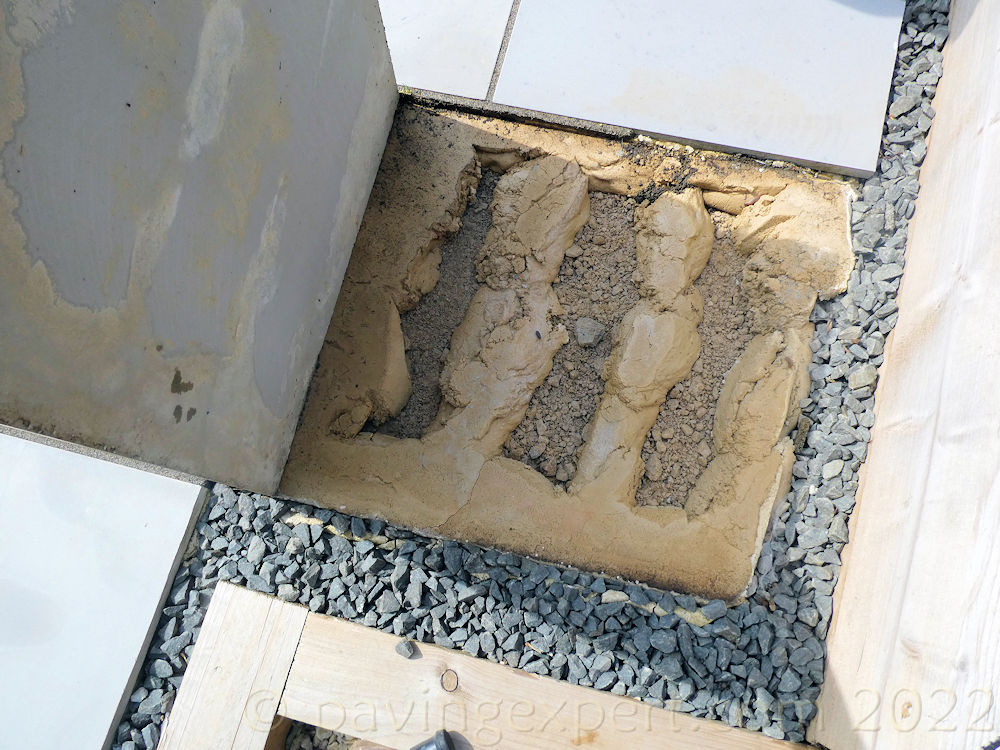
Again: it fails to provide a full bed or the 'uniform support' required by the British Standard, and therefore it is not acceptable, and no matter what excuses an installer may put forward, it never is acceptable.
And as with the other partial bedding methods, flags that have been ribbon bedded are more likely to feature reflective staining, this time in the form of.....you guessed it.... ribbons!
Construction
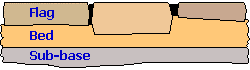
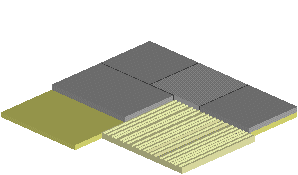
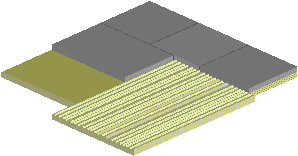
There are three essential layers to light-use flagged paths, patios, and driveways: the flags themselves, the bedding, and a layer of sub-base material. For pavements experiencing heavier usage, or where the ground ( sub-grade ) is unreliable (soft, boggy, made-up, or deep topsoil), a sub-base must be used. Drives, forecourts and public footpaths should use the thicker type of flags (50/63/70/80mm) or may use a concrete base onto which the flagstones are laid directly before it sets. Flag paving in the public realm will almost always have a well-prepared and well-compacted layer of sub-base material and/or a base layer of bound material such as bitmac, concrete or cement-bound granular material (CGBM).
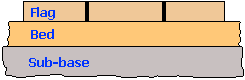
On small, low-use, pedestrian-only, garden projects, where the ground is hard and reliable, the layer of sub-base materials is sometimes omitted, but it must be acknowledged that this conflicts with the relevant British Standard and is something of a bodge. However, it has to be reluctantly accepted that, for example, when installing a single flag-width garden path, a short run of stepping stones, or a small (<5m²) hardstanding for a kennel or aviary, a sub-base will sometimes be disregarded.
Leaving out a layer of sub-base material is always a risk. The paving is highly unlikely to have a service life of more than 3-5 years at best, Think very carefully before deciding to omit this often critical layer. If there is any doubt: install a sub-base!
Preparation
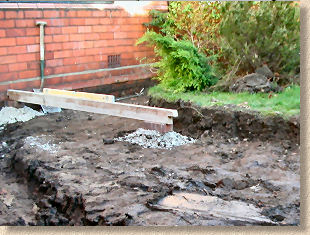
Decide where the paving is to run, and mark out as required. It is assumed that the paving is to be flush i.e. level, with the existing ground. It is a good idea to excavate wider than the planned pavement width, allowing an extra 50-100mm at the edges makes handling much easier.
Falls:
For commercial or specification paving projects, the minimum recommended falls for flag paving as stated in BS 7533:4 are 1:80 longitudinal and 1:40 transverse. There are exceptions, such as when proprietary drainage systems are incorporated into the pavement.
On private patio and driveway projects, a fall of approximately 1:60 is usually adequate. Bear in mind that heavily riven paving may require additional fall to prevent water accumulating on the surface, which can lead to discolouration, while smooth ground paving can often cope with a shallower fall (say 1:80)
See the Drainage for Pavements page for a fuller explanation of these terms
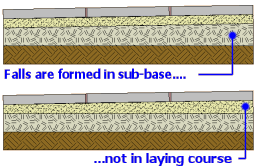
Falls are formed at sub-base (or sub-grade) level; that is, the sub-base is laid, levelled and compacted to the requisite falls, so that subsequent construction layers (laying course and the paving itself) are all of a fairly uniform thickness.
Sub-grade
The surface needs to be dug off to a depth of approx. 50-150mm. The depth of dig can be calculated as...
(average depth of flagstones + 25-40mm bed + sub-base [usually 100mm+])
Remove all weeds and other unwanted organic matter. Excavate any soft spots and fill with compacted sub-base material or a 10:1 grit sand/cement mix. Where the area of the paving is troubled with weeds, treat the excavated sub-grade with a general weedkiller such as Glyphosate.
Bear in mind that topsoil is regarded as an organic material which decomposes over time, causing settlement, and so ALL of it must be removed. It is bad practice to lay any form of paving or surfacing over topsoil.
Because most gardens have at least 150mm of topsoil, it's often much simpler to remove all of it, to a depth where a firm and stable sub-soil is revealed, and then install a sub-base before laying the paving on a full mortar bed.
Weed or root barriers are not essential unless there is known problem with roots or invasive, deep-rooted weeds, but it is unlikely that any weed will be able to penetrate the upper layers.
Where the excavated ground is suspect or unreliable, use of a construction geo-fabric may be beneficial.
"Do I really need a membrane or a layer of polythene underneath my paving?"
If an edging is required, it can be constructed at this stage or left until the rest of the paving is in place. Brick edgings, plain or decorative edging kerbs , kerbs or cobbles laid lengthways are all suitable.
Sub-base
As already mentioned, this is not always required for a path or patio when there is an existing suitable sub-base, base or hard, reliable sub-grade, but it is always better to have a layer of sub-base material than to omit it. When there is any concern whatsoever regarding the suitability of the sub-grade (see comments above regarding topsoil ) a layer of sub-base material, at least 100mm compacted thickness, should be used. On those smaller projects where a decision is made to risk it and leave out the sub-base, any low spots can be filled with crushed hardcore, crushed stone or compacted bedding material - see below .
If the area to be paved is such that it requires raising or elevating to a higher level, then the uplift should be constructed by including or adding to the sub-base layer, not by increasing the thickness of the bedding layer.
For driveway or other heavy use, the sub-base layer is the load bearing layer, and should be at least 100mm thick as a minimum, 150mm preferred. For public footpaths, the minimum is 100mm, increased to 150mm or more to give added protection to underground services.
Alternatively, the flags can be laid directly onto a mass concrete sub-base , but be prepared to work fast to cover the ground before the concrete sets!
The finished surface level of any sub-base, should be (flag+bed depth) ±10mm below finished paving level.
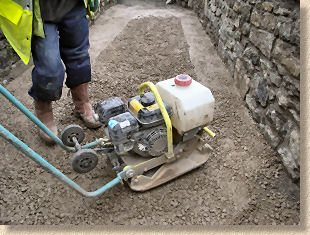
See sub-base page for details of acceptable materials and compaction methods.
Bedding layer
Flagstones can be bedded directly onto either:
- a cement bound bed approximately 20-40mm thick
- a coarse, grit sand bed, approximately 40mm thick
In general, most flagstones are laid onto a cement-bound material (a mortar or concrete). However, an unbound sand or grit bed can also be used when the situation warrants it. Just what that "situation" may be is examined in more detail on a separate page
When working with an unbound bed, DO NOT USE BUILDING SAND - it is too soft and can become 'fluid' when waterlogged, consequently moving beneath the flags, causing settlement, and it ioften contains too much iron mineral which WILL stain certain types of paving.
For light patios and pathways, the bedding material can be a 10:1 mix, which is adequate for most purposes. A stronger mix (6:1) may be used when working in wet areas, or where the movement of ground water could lead to bed migration, and we find it useful beneath the thinner patio flags as it gives the finished pavement a bit more solidity.
Refer to Bedding Materials page for details on various cementitious bedding mixes.
Coverage rate for bedding material is approx. 10-12 m² per tonne at 50mm thick, but this varies with moisture content. See Screeding page or the Aggregates page for more details on grit sands.
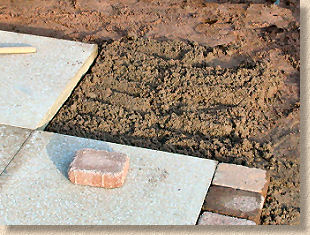
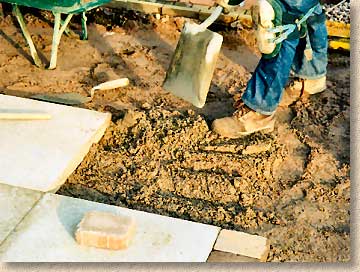
The bedding material should be spread to the area and compacted either by trampling or with a couple of passes with a plate compactor prior to bed preparation, which will be one of the two methods previously mentioned.
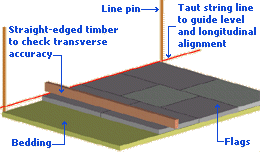
The flags should be laid to a taut string line, to aid coursing and levelling accuracy. Basically, a length of string is stretched from one known point of the paving to a projected point, and used to guide longitudinal line/level. A straight-edged timber or long spirit level (1000mm or more) is used to check transverse accuracy.
The distance between consecutive line pins should not exceed 10 metres. See the Setting Out page for more detail on establishing lines and levels for paving projects.
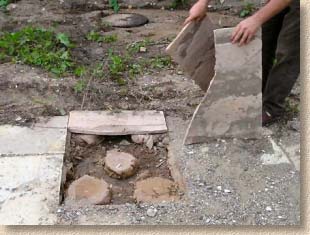
Individual bedding
Use a spade or large trowel to level out the bedding material, which should have the top 15-25mm loosened to allow the flag to be bedded down - this is usually acheived by 'rippling' the bedding surface, creating small troughs and peaks with the blade of a trowel. The bed should be 5-8mm high to allow for consolidation. Use the taut string line as a guide - use a piece of broken flag or a piece of timber cut to the correct thickness to judge the level of the bed adjacent to the line.
Make the prepared bed spread 100mm or so further than the flag will cover - it is better to have the bed to big than too small, leaving an edge of the flag unsupported.
The true art of flag laying is to get the bed right on the first attempt, so that the flag can be laid and consolidated without having to be repeatedly lifted while bed adjustments are made. If you have 100 flags to lay, and it's taking 3 attempts to get each bed right, you've laid 300 flags in actuality, but have only 100 to show for your efforts.
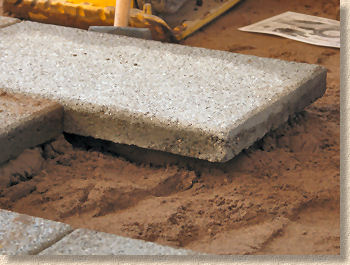
Screed bedding
The bedding material is spread out over the area to be paved, compacted lightly with a plate compactor (around 2 or 3 passes) and then screeded to level 5-8mm high as explained in more detail on the Screeding page.
Flags at a free edge
Where flags are laid to a free edge, that is, an edge where there is nothing firm or solid against that edge, as is the case with a garden path and some patios, the edge flags are often best bedded onto a wettish mortar in order that they are held firmly in place. As the mortar (or a suitable concrete) cures and harden, it holds the flag fast and prevents lateral movement.
Some suitable techniques for use with edge flags are considered on a separate page .
Buttering or not?
When using a traditional mortar joint, the 'receiving edges' of the previous flags can be 'buttered' with a generous amount of a jointing mortar , taking care not to get any of the mortar on the surface of the flag. The next flag to be laid is then offered to the receiving edges, squeezing against the mortar that has been buttered thereon.
The joints can be topped-up with additional mortar or cementitious material once the flags are aligned and consolidated.

Open Jointing
With the Open Joint method, the flags are laid without any buttering mortar prior to their being filled with a mortar , slurry or wet resin jointing material on completion of the actual laying. When using this method, it is advisable to use small pieces of plywood or other temporary spacing material between the flags to maintain regular 8-10mm wide joints.
GapFast Paving Spacers are specifically manufactured for this task - read more here
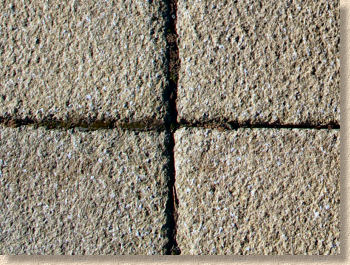
Butt Jointing and Close Jointing
With dry jointing, the flag is positioned and pushed hand-tight against the preceding units, but not so tight that the joint is completely closed. For dry-sand joints, the flags should be separated by no more than 5mm. There has to be some gap to allow the jointing sand to enter, but it needs to be kept to a reasonable minimum otherwise there is a real risk that the jointing will be removed by scour action .
This technique is often incorrectly referred to as 'butt jointing' but it is actually "close jointing". Butt jointing normally means that adjacent flags (or other paving units) are in direct contact with each other. This is NEVER a good idea as any movement of the flags can result in spalling of the surface.
Laying the flags
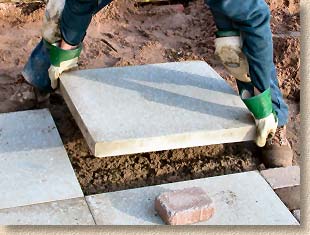
The smaller paving units, such as those shown opposite, are often light enough to be lifted directly into place, but the larger units, 450x450mm and above, need to be lowered carefully into position.
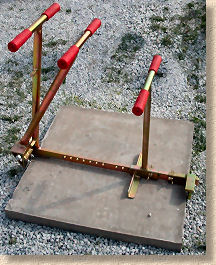
Most flags larger than 450x450mm are relatively heavy and often weigh more than the maximum recommended in manual handling guidance (usually taken to be 25kg). Whenever possible, specialist paving tools and lifting aids should be used when working with these larger units.
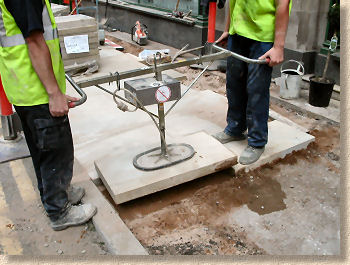
Video: Using a Vacuum Lift to lay flags
Returning to unaided manual laying, there are two ways of laying the bigger, heavier flags - from the paved surface and from the leading edge. Note that when using the screed bedded method, work must be done from the paved surface to avoid disturbing the prepared screed bad.
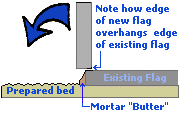
Walk the flag into a position where the bottom edge is hanging over the lip edge of the preceding unit, roughly halfway, as shown in the diagram opposite. This ensures that when the flag is lowered into position on its bed, it remains relatively 'tight' to the preceding flag.
Make sure you have the flag in the correct orientation, so that it will not be upside down when laid. Holding the top edge of the flag with both hands, squat down behind the flag and lower it carefully into position, allowing it to pull you up out of the squatting position. This technique places less strain on the back muscles than lowering the flag from an upright or stooped stance.
Always lay flags the 'narrow' way - ie, if laying a 600x300mm flag, make sure the 600mm long edge is on the ground and that you are only stretching 300mm to lay the flag.
One technique we use to avoid excessive strain on the back, is to use the pavior's maul to take the bending motion out of lowering the flag. The head of the maul is used to hold the 'top' edge of the flag, which is then lowered by the tradesman who controls the flag's descent via the maul.
Laying from leading edge
Walk the flag to be laid into position so that the bottom edge of the flag is aligned to deliver the flag into the correct position. Keeping one foot against this bottom edge to prevent the flag from slipping backwards, grip the flag on the open side and carefully lower it into position on the bed. Make sure you do not get your fingers trapped between the flag you are laying and the preceding unit.
It is not possible to use the maul assisted lowering technique mentioned above when laying from the leading edge, as there is no space for the head of the maul between the top of the flag being laid and the leading edge of the existing paving. This means extra strain on your back, so extra care must be taken.
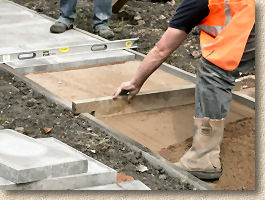
Consolidation
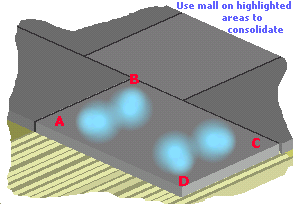
Once on the flat, the flag is nudged into alignment with the maul , and is then tapped down to the correct level with the maul until it is 'flush' with the surface of the preceding flags and/or the string line guide. Use light taps on the areas indicated on the diagram. If you tap too near a corner, the flag might break, if you tap too hard over a hollow in the bed, the flag might break, so remember, light taps and plenty of them. Concentrate your 'taps' on the four main areas indicated.
Some of the small element paving is suitable for consolidation by running the plate compactor over the surface, rather than individually consolidating each flag. Do not attempt this method with patio flags - they are not strong enough and were never intended to be plate compacted - they are almost guaranteed to break and, on some of the decoratives, the surface detail will be spoiled.
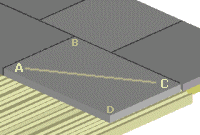
Straddle the flag diagonally and shift your body weight about to check that the flag isn't rocking. If the flag is rocking when you straddle corners A and C, then areas B and/or D must be high - tap them down until the rocking stops. Conversely, if the rocking is along the B-D axis, areas A and/or C must be high. Use a spirit level to check that the flag is falling in the required direction for drainage.
Oh Flip! It's too high!
The flag can only be tapped down a limited amount. Beyond a certain point, no further compaction is possible and if you persist in hammering it with the maul, the flag will break. There is only one remedy, the flag will have to be lifted and re-bedded, but before you do lift the flag, make a mental note of where the flag is high and by approximately how much, then, when you've lifted the flag and stacked it safely while you adjust the bed, you can use a spade or a trowel to reduce the bed in the necessary areas. Once again, loosen the top 15-20mm of the bed and try the flag again. Hopefully, it's right this time.
Oh Sugar! It's too low!
If the flag is too low once you've consolidated it with the maul, it will have to be lifted and the bed added to before relaying. Simply lifting one edge of the flag and packing bedding material in as far as your fingers will reach is not a good idea - it can leave a void in the centre of the flag, meaning the flag is only supported on the packed edge and the opposite edge. Again, make a mental note of where it is low and by how much, lift and stack the flag safely out of the way, and then add bedding material to the entire bed, re-levelling with a trowel or spade before re-laying the flag.
Jointing and/or Sealing
A number of jointing options were briefly introduced above and such is the range of alternatives that a whole separate series of pages has been created to consider each in turn.
In summary, there are four main options:
- No jointing - close-jointed and allowed to fill with detritus
- Loose jointed - usually a dried sand
- Cement Mortar - sand/cement mortars and slurries
- Resin Mortar - polymeric sands and resin slurries
Many factors contribute to determining which will be the most suitable jointing method for any particular project. There is no single 'always right' solution.
See Pointing and Jointing Pavements and Jointing for Stone Paving pages for further detail