Introduction:
There is some confusion regarding just how and when the edge courses used with a block or other modular pavement are constructed.
Considering at what stage the edge courses should be installed, a separate page looks at the pros and cons the two options: constructing them before the body paving is laid, and laying them after the body paving is put in place.
A further page follows the installation of an edge course constructed using a single width brick paver.
And then there's yet another page which looks at a whole range of options that could be considered when choosing just what to use as an edge course.

The confusion explained:
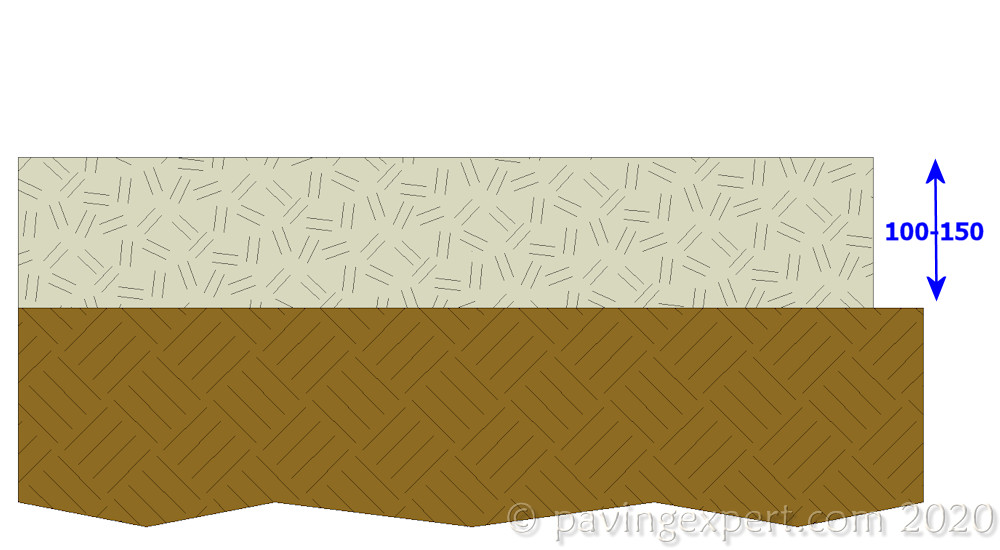
The aforementioned confusion seems to stem from the fact that the level of the sub-base on completion is too high to accommodate the concrete bed needed by the edge course blocks (or other units, if used).
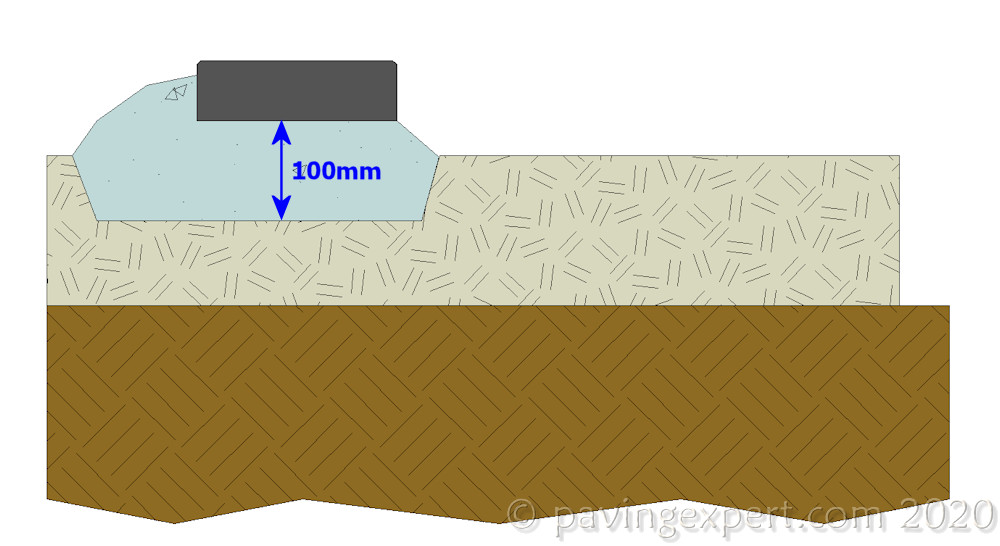
When a laying course of just 25-40mm is required, the sub-base is prepared to that level, which then means that there is insufficient depth to accommodate the 100mm of concrete required as a bed for the edge course blocks.
That's true, but it assumes that the sub-base is completed *to finished level* before constructing the edge courses.
Trough Method:
The above scenario is not always the case. Only in some instances is the sub-base brought up to finished level before edge courses are installed. Some contractors prefer to work this way, completing the sub-base and then excavating a shallow 50mm or so deep trough into the sub-base material to accommodate the concrete bedding.
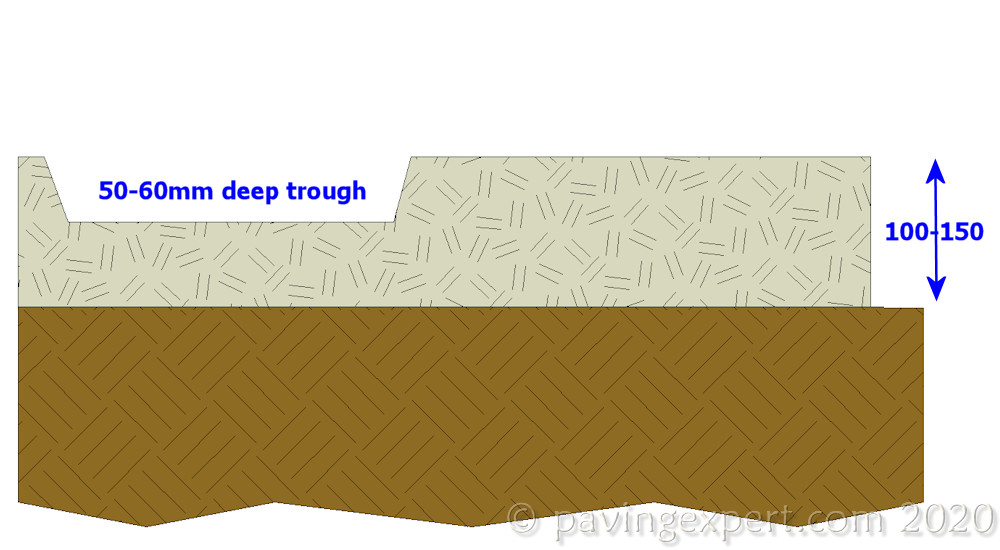
This ensures the edge course is properly constructed with adequate bed depth, and the sub-base is ready to use as soon as the edge course is in place.
Staged sub-base method:
A more common methodology, which eliminates the need to excavate a trough in what is a perfectly formed sub-base, is to create the sub-base in two, separate stages.
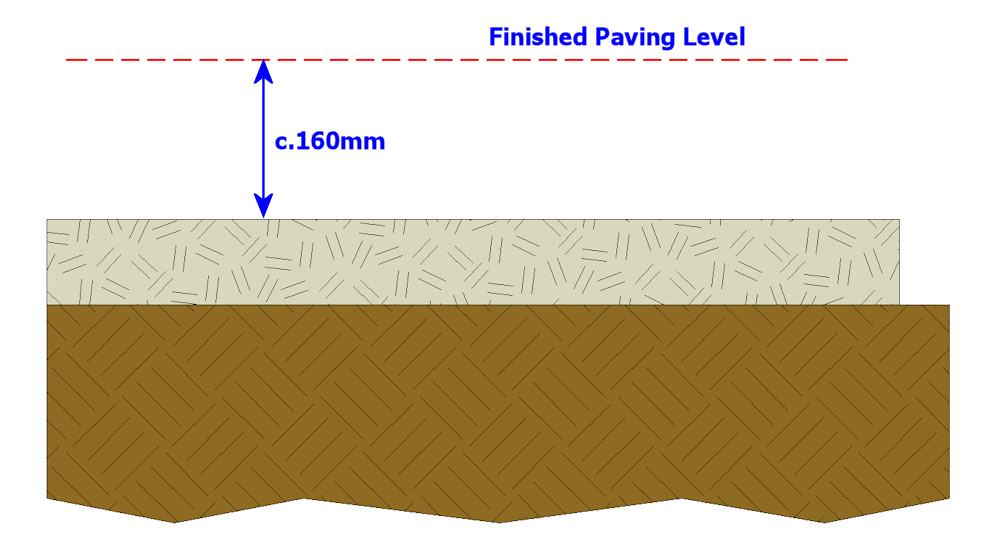
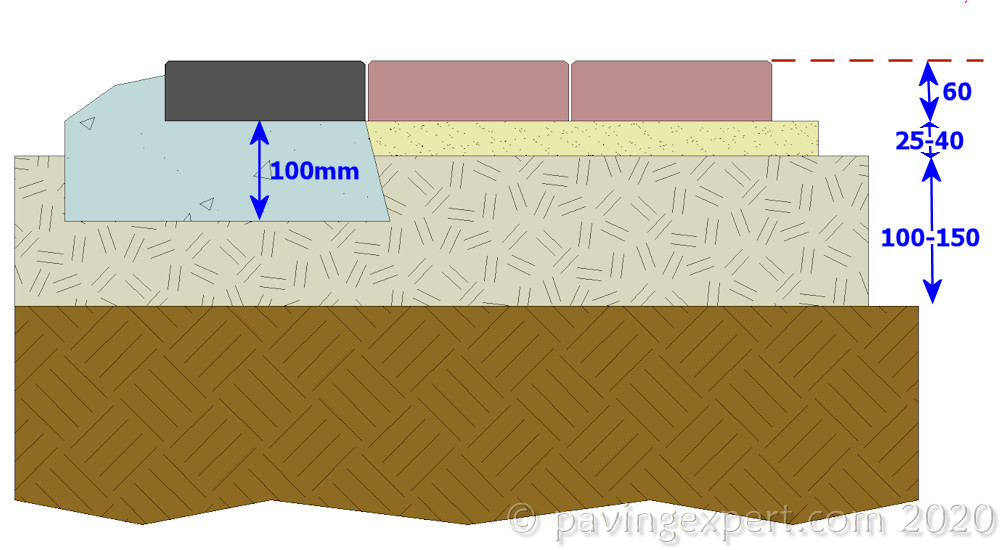
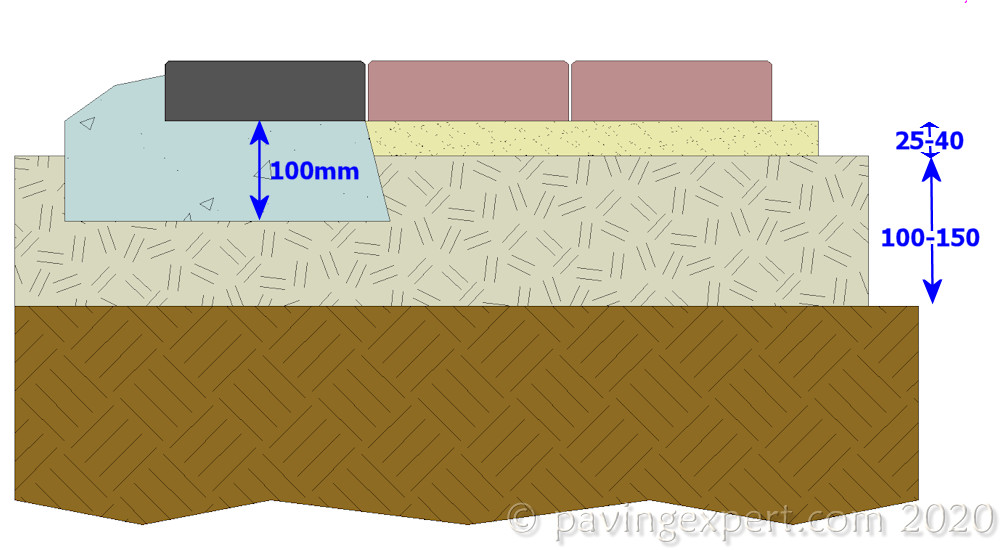
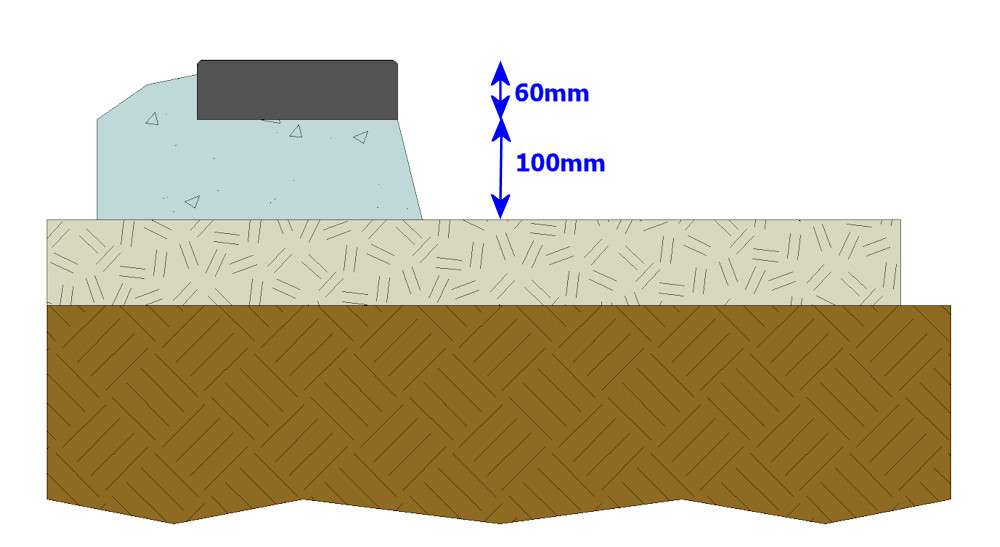
The first stage sees sub-base material spread, levelled and compacted to a level which will accommodate the block, brick or whatever is being used as the edge course restraint, along with 100mm of concrete bedding.
So, if a 60mm paver is being used to construct the edge restraint, allowing for the 100mm bed depth of concrete, the sub-base is prepared to a level 60 + 100 = 160mm below finished pavement level.
The edge course can now be constructed, following the methodology depicted on the Case Study page , with the chosen units bedded onto concrete, tapped down to level, aligned and then haunched to make them secure.
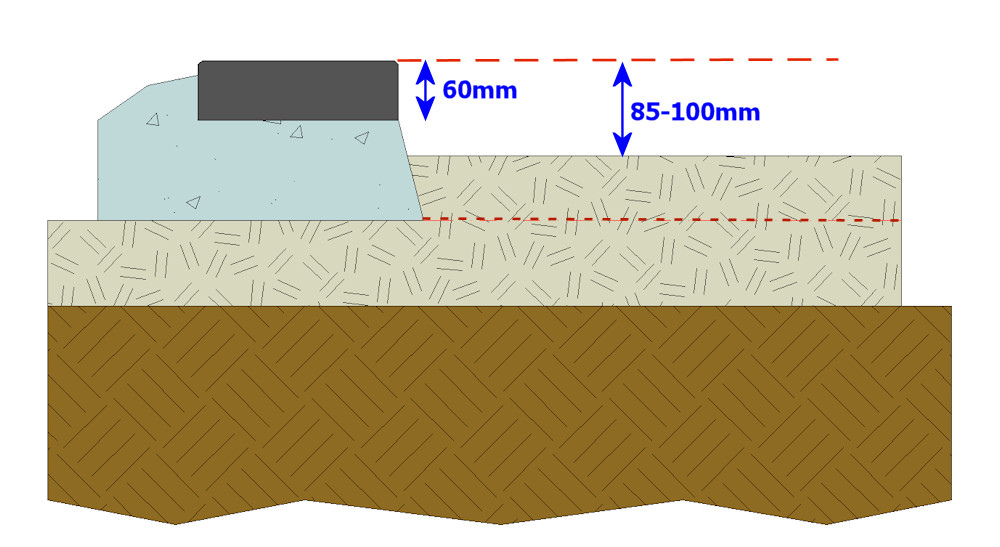
Once the edge course is in place, additional sub-base material can be brought in and used to top-up or 'regulate' the existing sub-base layer to bring it up to the requisite level.
In theory this can be done as soon as the edge course is in place, but in practice, it's better to allow the edge course bedding and haunching 24 hours or so to harden, if site conditions and time permit.
Completion:
Whichever of the two methods is used, once the edge course is in place, it's simply a matter of preparing the laying course, screeding it off, and laying the paving.