Introduction:
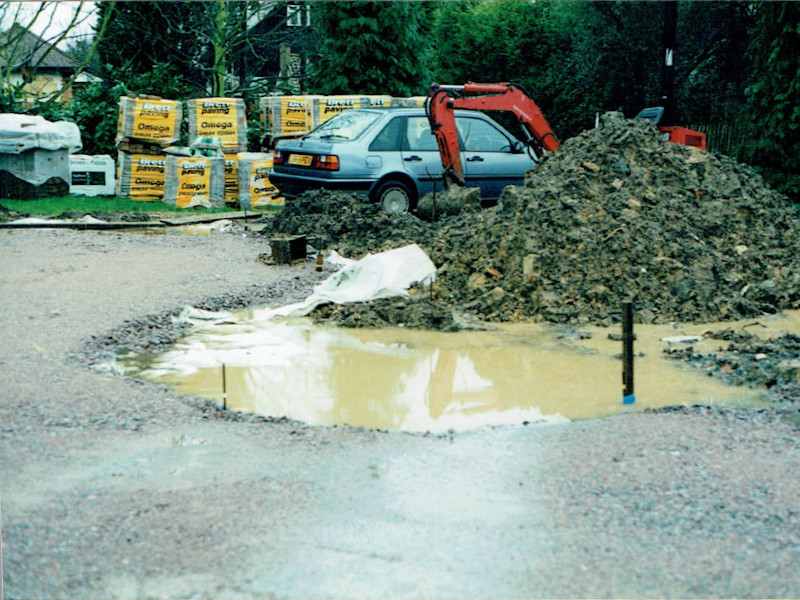
It’s almost inevitable in the construction of any pavement that, once Formation Level is reached and the sub-grade exposed to the elements, the heavens will open, inundate the site, and submerge the ground beneath a lake of muddy water.
It’s not a good idea to start the construction work over a drowned foundation level. All that mud and slosh will contaminate any aggregates being used as a capping layer or a sub-base and compromise their structural potential.
So, the first thing is to get rid of any excess water.
Drainage and Sumps:
Losing the water
This essential draining of the floodwaters might be achieved by creating an escape route or drainage channel that will allow excess water to run away from the site, leaving behind a soggy, muddy base, but one that, at least, is not underwater. On enclosed sites, where it’s not practical or possible to create escape channels, the best option is to excavate a sump point (or several sump points) where water can collect and then be pumped clear of the working area.
A sump is essentially a hole that is deeper than the rest of the site. It doesn’t need to be overly deep – 100-150mm lower than the main formation level is more than ample – and it doesn’t need to be accurate: any shape or size will do, as long as it’s deeper than the base and big enough to take the intake head of a pump or, if it’s one of *those* jobs, accommodate a dunked bucket.
Sumps should always, as far as practical, be sited at the lowest point on a submerged sub-grade or other sub-layer. For what should be obvious reasons, there’s not much point in excavating a sump at the high point of a project!

The premise is that water will always flow to the lowest point, so it will gather in and around the sump, from where it can be pumped or bailed out as appropriate. As water is removed from the sump (by whatever means) more will flow in and be pumped out, until, eventually, the site is more-or-less free of excess water.
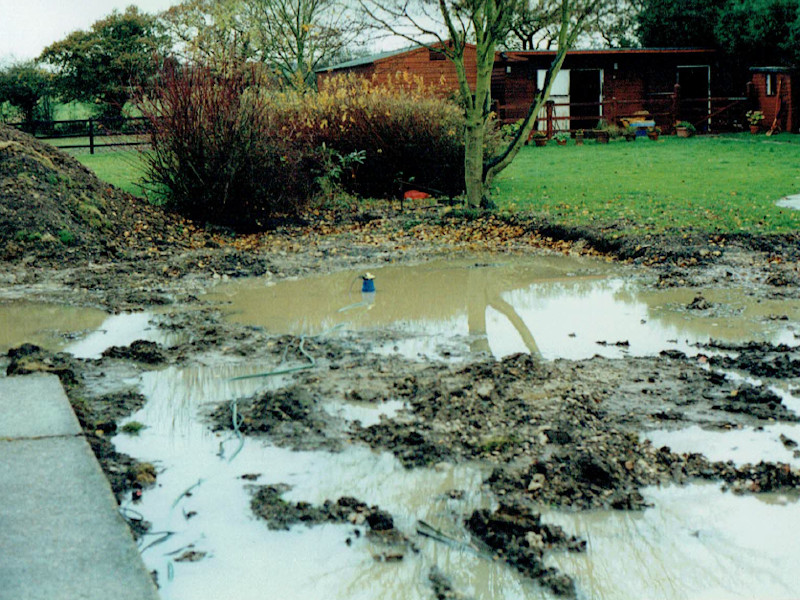
However, that de-watered foundation is now probably slushy and sloppy and squidgy and far from ideal. And before any aggregates can be placed, all that sloppy stuff should be removed.
It may be a matter of scraping the surface with an excavator bucket or shovelling it out a bit at a time, but the aim is to clear the base of any loose, soggy mud and to reveal a reasonably firm and non-squishy sub-grade upon which a pavement can be constructed.

Once it's clear...:
As soon as a suitable base is achieved, it’s a good idea to get a non-woven permeable geo-textile down over it as quickly as possible and then a covering of the selected aggregate. Once the geo-textile and aggregate are in place, there is much less risk of that underlying sub-grade being ‘pumped’, being turned into even more mud and mixed with the aggregate.
When a stoned-up capping layer or sub-base is wetted or even submerged, it’s less of a concern. The aggregate is (or should be) firm and compact and less prone to damage by inundation. That’s not to say that it can’t be damaged by prolonged submersion – it definitely can – but it is far more resilient and better able to cope with short term (1-3 days) flooding.
In such circumstances, where a prepared sub-layer is under water, all that excess water will need to be removed before any subsequent layers are placed, whether that’s more crushed aggregate to build-up the sub-structure, or a laying course of sand, grit or mortar for the final paving layer.
The same techniques as described above can be used: create drainage channels or excavate a sump and get rid of the excess water. It’s *never* a good idea to place any aggregates onto a sub-layer which lies beneath more than 25mm or so of water.