Introduction:
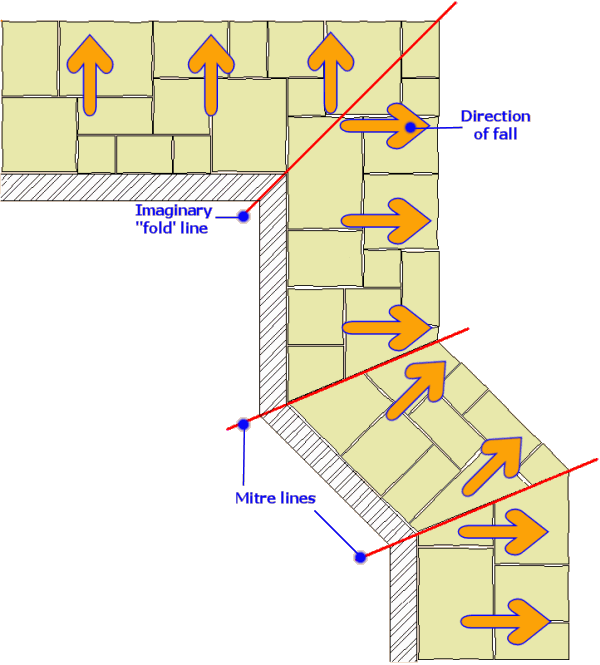
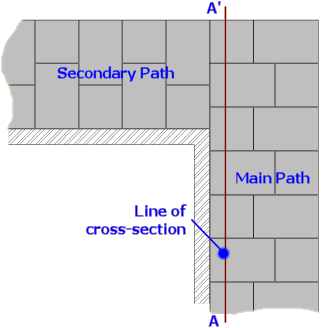
In most cases, paths 'flow' around the corner, maintaining pattern and/or alignment as far as practical, as though the paving had been cut from a template sheet. The most common exception is a runout corner , where one branch of the path continues straight across the second branch, until it runs out at the edge of the path. At a runout corner, the fall on the main path can change direction to match that of the secondary path.

Simple Mitre:
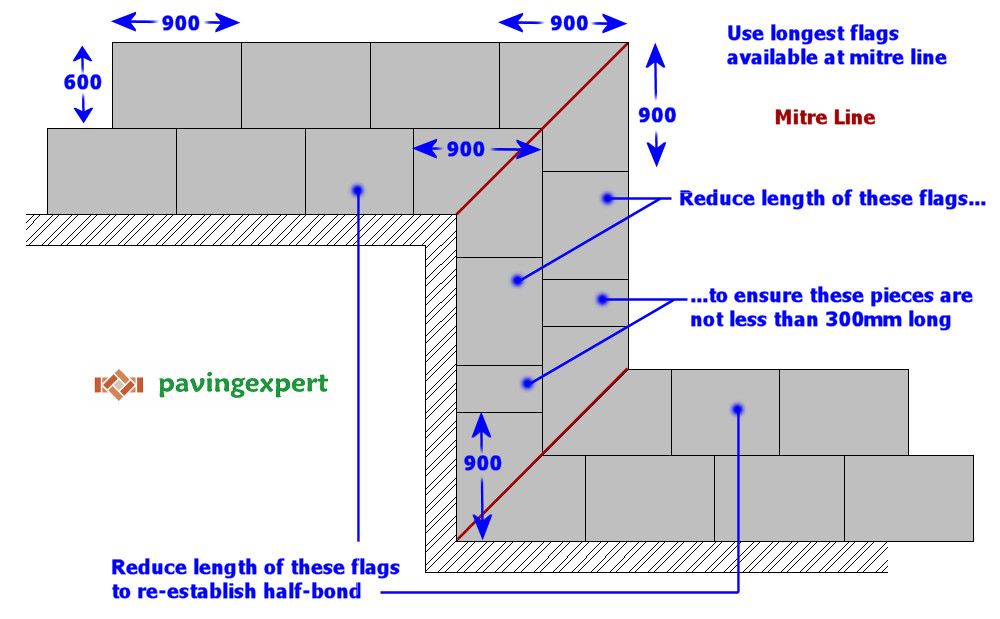
The simple mitre is the easiest and most straightforward option, particularly when using pcc flags or other budget paving. The key to success is to forsake the layout or pattern and use the longest flags available at the mitre line - the aim is to be certain that the cut pieces have at least four sides and there are no small, nasty, bound-to-fail triangular pieces. Make adjustments elsewhere in the layout or pattern to re-establish the pattern, but ensure any cut pieces are at least 300mm in length.
Mitre Not Suitable:
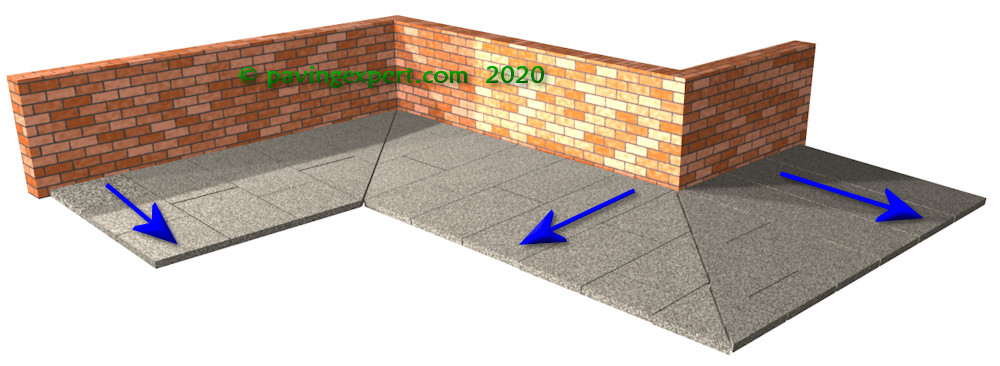
On some projects, a straight diagonal line slicing through the paving at each corner would be aesthetically undesirable (posh way of saying 'ugly') because it looks unnatural or forced, so a method has to be found to maintain the layout or pattern of the paving yet accommodate the change in direction AND in fall.
The importance of fall on paving is explained elsewhere on this website , so it should be obvious why the need to maintain fall as a path turns a corner is so critical. On most pathways around a house or other property, the fall is primarily crossfall: surface water is directed away from the property. This is an incredibly simple solution, and simple is usually best.

However, when two such paths meet at an angle, how can there be crossfall at the intersection? The direction of fall on one path conflicts with that on the other. If the two paths are viewd as planes, it can be seen that there would be fairly obvious lips or trips formed where the planes intersect.
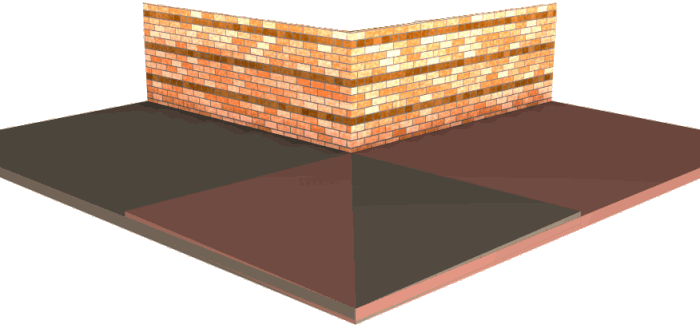
This conflict is resolved by gradually folding the paving, changing crossfall through 90° (or whatever is the angle of the corner) to create a smooth and barely noticeable change of direction.
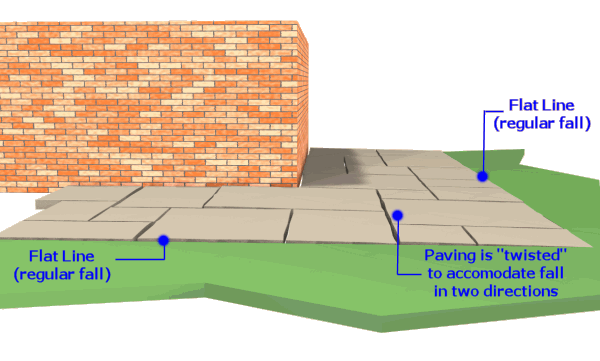
Setting-out a twisted corner:
In terms of setting-out, the level of the paving against the building (the inner edge) is self evident. The paths have to meet at the same level. The outer edge of the paving follows the same plane as the inner edge, albeit at a lower level. Where the two paths meet the individual planes to which each should be laid will intersect.
Where both paths are of the same width and/or have the same amount of crossfall, a string line used as a level guide for the outer edge of one path will be at the same level as a string line set for the outer edge of the second path.
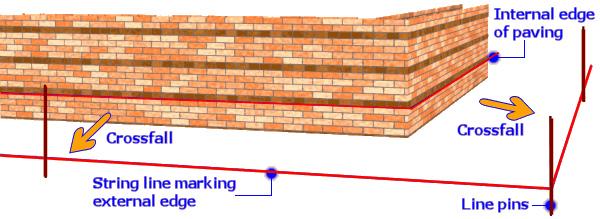

In principle, this results in the paving units being laid to a gradually changing plane, folding over to meet the plane of the other path. It's worth noting that this folding of rigid paving units can often result in 'lips' on the paving unit as the direction of fall is rotated. Larger units will result in larger lips, so, as with all folded paving, it's better to use smaller units if at all possible. In exceptional cases, larger units may need to be diagonally cut to alleviate significant lips.
It's also worth noting that folds or twists with porcelain paving can look truly awful, so an alternative strategy (mitre or break bands) may be required.
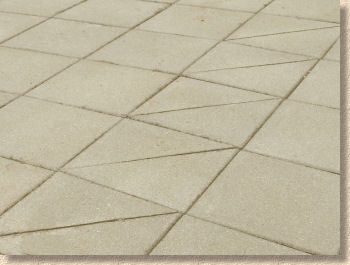

So: in essence, when paving pathways around corners, look to maintain crossfall as far as practical, and accept that, unless there is a definite mitre line , such as at a 45° turn, the paving units will need to be twisted or folded to accommodate the change in fall direction.
