Basic Construction
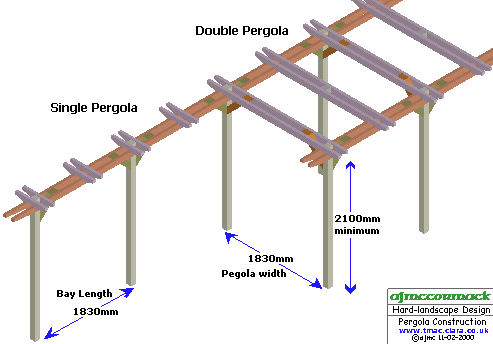
These very simple plans can be adapted to build a single or a double pergola as shown in the drawing opposite.
All timber should be pre-treated, preferably tanalised or similar. Rough sawn timber is normally used, but 'planed all round' can be used if you want a smoother look.
If you intend staining or colouring the pergola, it's usually easier to do this before construction, rather than fiddling about on a step ladder once the pergola is built.

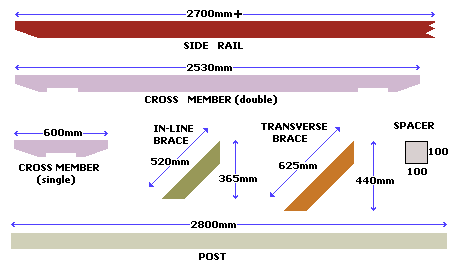
The side rails and cross members could be made from 100x38 or 100x25 timber if preferred, but the notch cut into the cross members must be adjusted accordingly.
Obviously, some of the side rails in a lengthy run of pergola will not require any end detailing.
The Uprights:
The first step in construction is to erect the posts that will carry the pergola. The posts need to be concreted into the ground to a depth of at least 450mm (see fences page for more detail) and must project at least 2275mm above paving level. This is calculated as.... So, overall post length needs to be (2275mm + 450mm) = 2725mm minimum.
To accommodate standard fence or trellis panels, the bays need to measure exactly 6 feet (1830mm) between the posts. If you have a fence/trellis panel available, it can be used to check the spacing between posts.
The width of a double pergola is a matter of taste. These plans allow for a width of 1830mm, exactly the same as the length of a bay, but this can be adjusted to suit. However, anything over 2500mm wide looks out of proportion to the height.
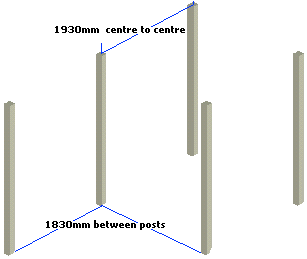
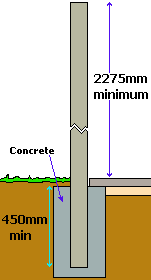
Dig post holes approximately 300x300mm in plan at 1930mm centres to a depth of around 500mm. Set up taut string line to ensure alignment. Erect first post and fix in place with concrete. Check spacing and alignment to next post before fastening in with concrete. For the double pergola, check that the posts on each side are square by measuring the diagonal, which should be 2588mm ±2mm.
More on erecting upright posts on the Fences page....
Allow concrete to set, preferably overnight, before continuing with the construction.
Side Rails
The next stage in construction is to attach the side rails. These are fixed to the posts via two 80mm stainless steel or brass screws. Normal wood screws will rust over time and are not suitable for this type of work. You will find it easier to drive the scews if pilot holes of a slightly smaller diameter are drilled first.
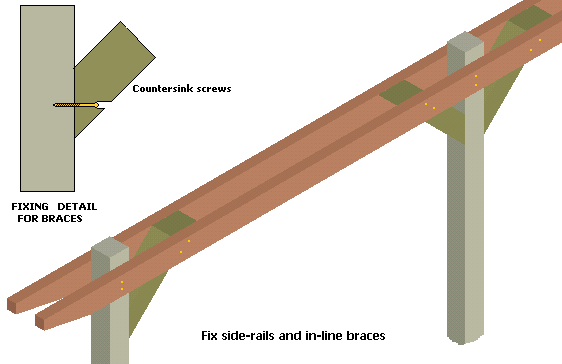
Check that the bottom of the rails are at least 2100mm above the paving and check horizontality with a spirit level before final fixing. On a double pergola, it's also essential to check that the rails on each side of the pergola are horizontally level with one another. When fixed, there should be 100-150mm of the post projecting above the top of the side rails to enable fixing of the cross members in the next stage.
Use one anchor bolt or two screws to fix the inline braces to the post. The mitred ends of the braces should lie flush against the post and level with the top of the side rails. You will find it easier to fix these braces if they are held in position with a G-clamp or with temporary nails while the screws/bolts are inserted.
Cross Rails
Once the side rails are in place, the cross members can be attached. The notch cut out of the cross members should span the side rails. The rails in the centre of each bay should be centralised by checking the distance between the cross members and the posts. With a spacing of 1830mm between each post, the distance from face of post to face of nearest cross member should be 815mm, with 100mm between the two central cross members.
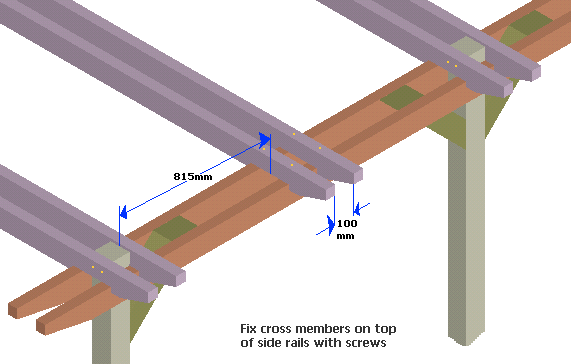
The centre-bay cross members are to be fixed through the top to the side rails by means of a stainless steel or brss screw, while the post cross members can be fixed either to the side rails or to the posts.
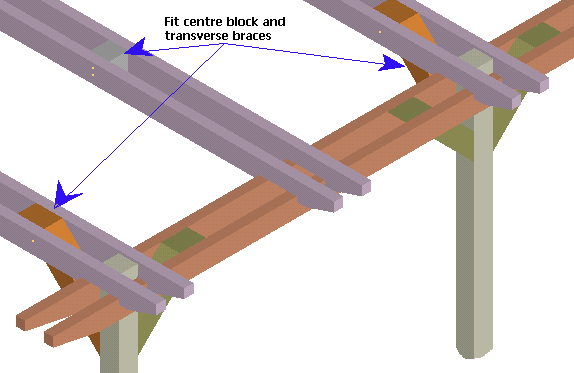
Finally, the transverse braces should be fitted in the same method as was used to fix the inline braces earlier.
For the double pergola, you may wish to fit the spacer blocks between each pair of centre-bay cross members, although these are not essential if using 50mm wide timber for the cross members. Again, fixing is via stainless steel or brass screws.
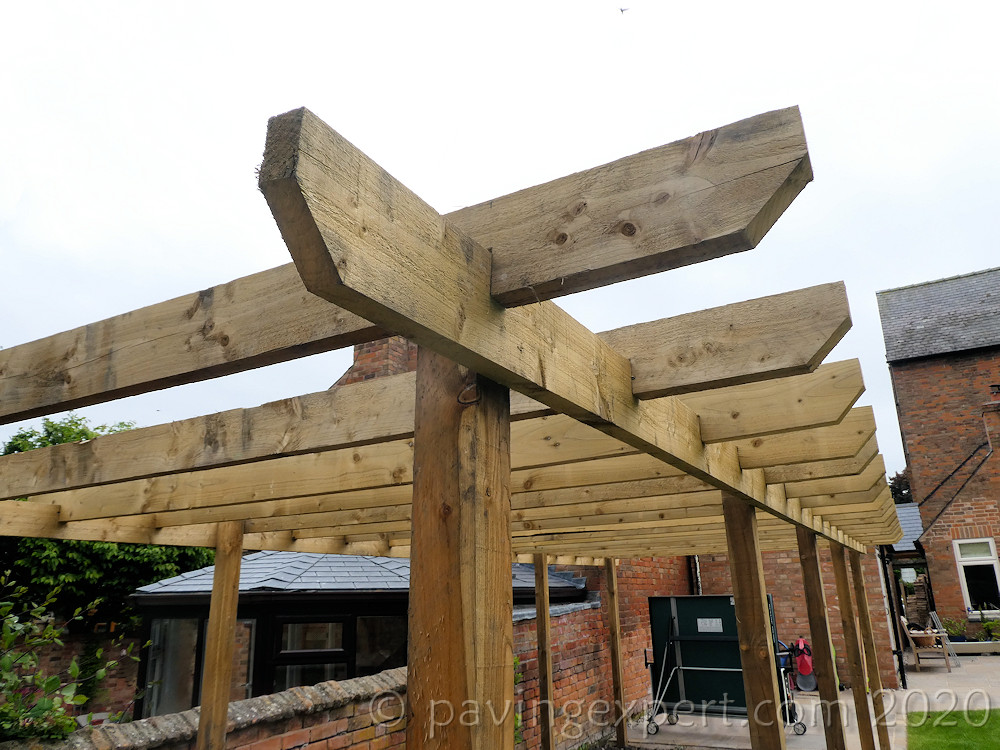
And that's it - pergola complete! Climbing plants such as honeysuckles or roses can be planted in prepared holes at the foot of the posts and trained to entwine themselves up the posts and along the structure, and in 3 or 4 years time, once they've had a chance to grow and the woodwork has mellowed with age, the effect will be complete.
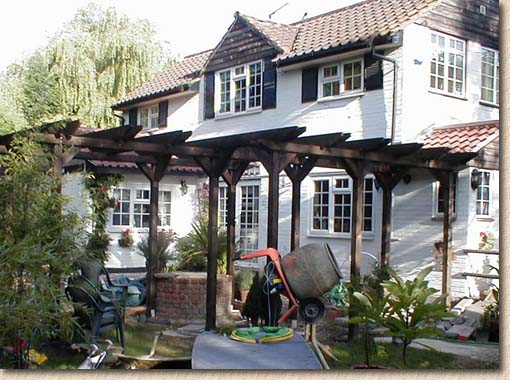
And just to prove it's possible, here's the finished article, as built by site-reader Alan Goldsack using the plans reproduced on this page.
