Introduction:
This facility was commissioned by Tameside MBC in Greater Manchester as part of their effort to improve the local environment for residents and to improve the skills of their highways workforce.
The panel was constructed with two purposes: firstly to act as a training aid for the highways' department operatives, and secondly to determine a suitable construction build-up for permeable pavements in the local area. As such, the detailing has been kept simple and the edge restraints have been formed from road kerbs and flags laid on edge. This is NOT standard practice for CBPP where more traditional edge restraints would normally be used.
The page is intended as a very basic guide to the key stages in the construction of a permeable concrete block pavement.
Starting Off:
This is the base 'container' for the trial pavement. It comprises heavy road kerbs and flags-on-edge which have been laid to form a rectangle and act as effective edge restraints for the paving. On a more formal installation, these edge restraints may be walls, existing kerb lines or specially constructed edge restraints using blocks , edgings or small kerbs.
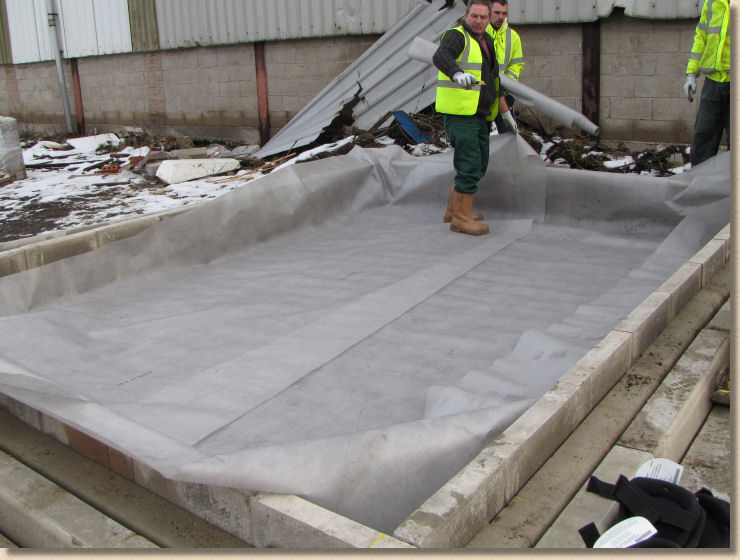
This is an 'System A' infiltration pavement, so all collected surface water is returned to ground, although there may be some attenuation within the sub-base reservoir.
A permeable geo-textile is used to line the base of the pavement. This will allow water to escape to ground, but will keep the sub-base material separate and, quite importantly, keep it clean and free of soil or sub-soil. As with more usual geo-textile installations, individual sheets or strips are overlapped by at least 300mm and could be taped to prevent the sheets moving when the sub-base material is added, but this is not essential for this particular project.
Sub-base:
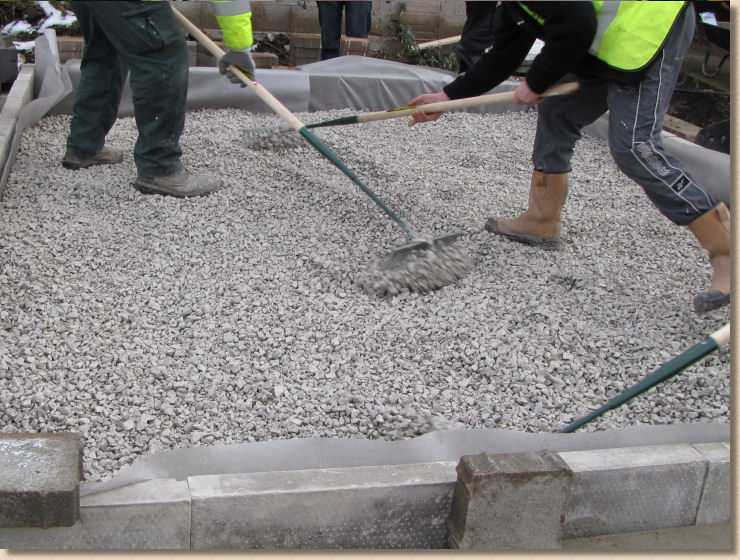
The sub-base is placed.
The pavement has been designed to have a sub-base which will be around 300mm deep which could present consolidation problems even when using heavy compaction kit. Therefore it will be placed as two separate layers of 150mm, with each layer being compacted prior to placing subsequent layers of either more sub-base or laying course material.
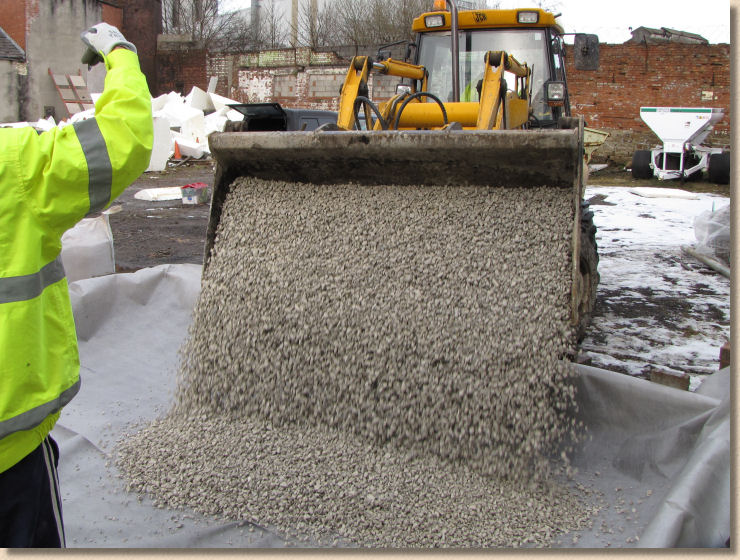
So, a loading shovel brings in the material for the first layer and this is spread and levelled by the operatives.
The sub-base material is Close Graded Aggregate , the 4/20mm type which should give a void volume of around 32%.
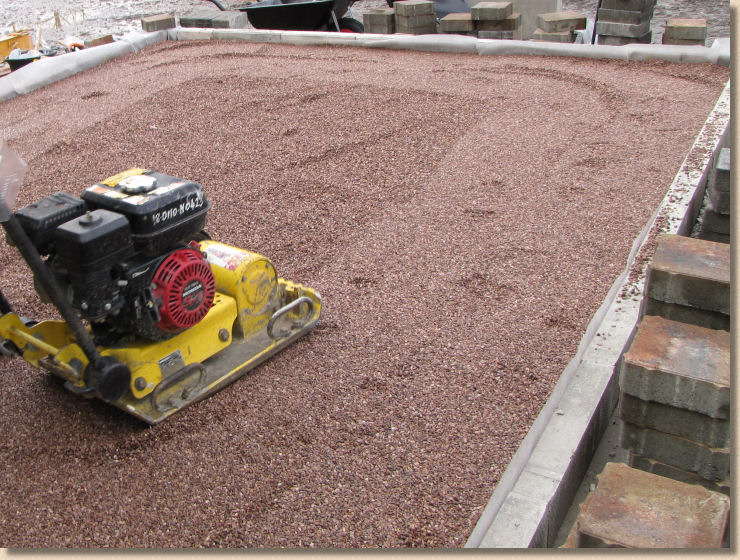
Once that first layer is spread, it can be compacted....
....not how little the CGA compacts when the vibrating plate passes over. This type of material has virtually no fines to 'fluff it up' and so the clean aggregate readily settles under gravity alone to near full compaction and the plate is used to introduce vibration to achieve that final 10-15% (15-22mm in a 150mm deep layer)
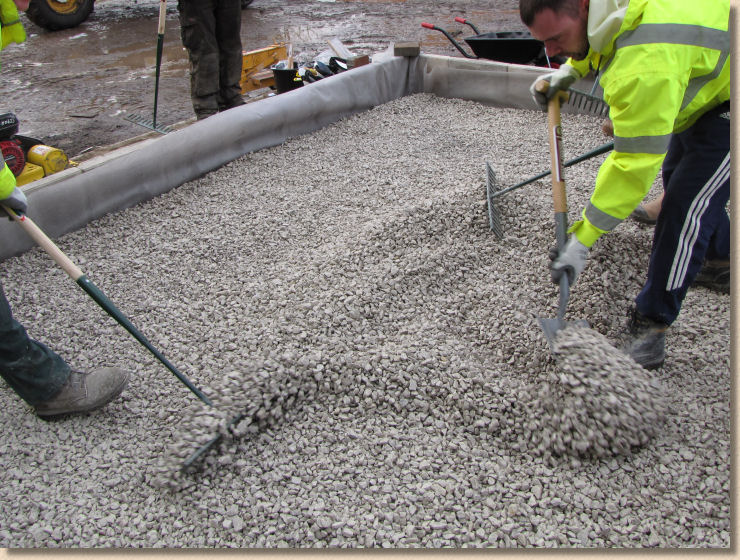
So, the second layer of CGA is placed, spread and levelled....
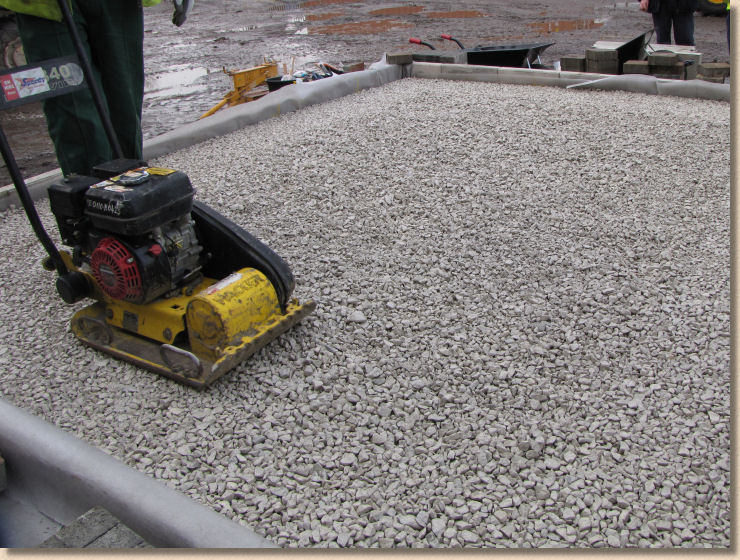
....and that second layer is given a couple of passes with the plate vibrator to settle it in.
Note the level of the sub-base now relative to the top of the restraining edges. The compacted level should be around 100-110mm below the tops, to accommodate 40-50mm of laying course and then the 60mm thick pavers.
Laying Course:
On completion of the sub-base, the Laying Course material can be introduced. Again, this is a specially selected, clean aggregate, roughly 2/6mm which is supremely free-draining but small enough to be accurately screeded to the required level.
On this project, it is delivered to the working area in bulk bags, but on larger projects, it may be brought in from a stockpile via wheelbarrows or a loading shovel.
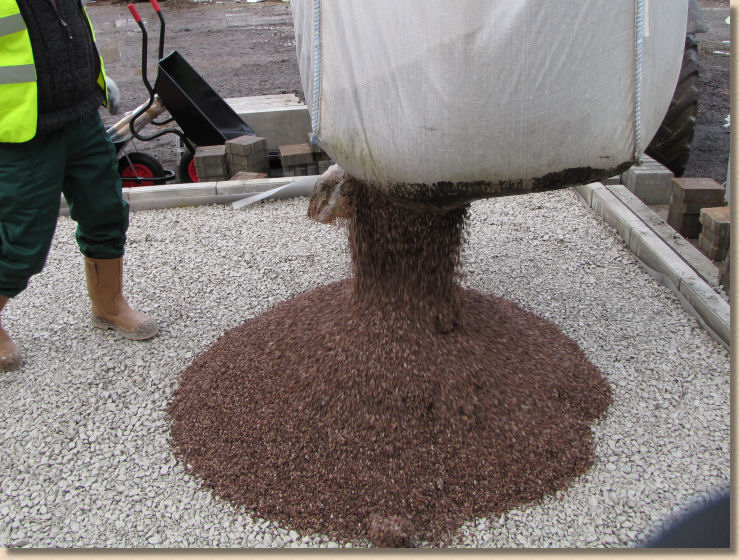
Don't be distracted by the colour of the laying course. Colour will vary according to what aggregate source was used. This pinky-brown quartz aggregate hails from Staffordshire, originally.
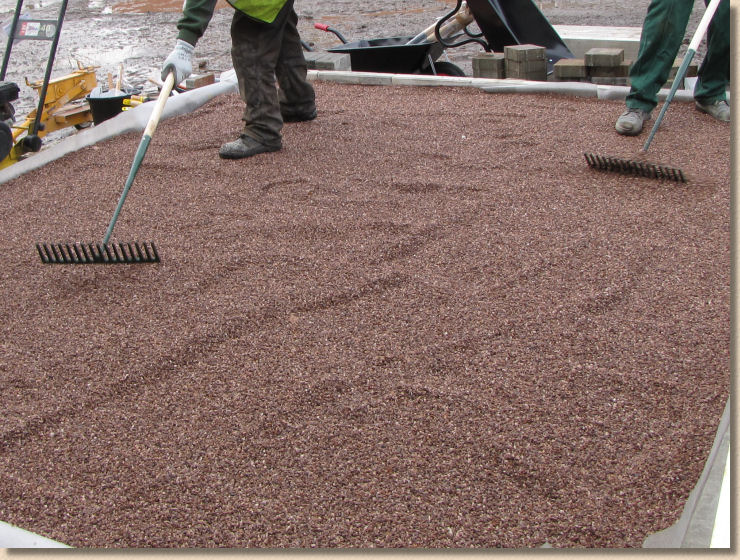
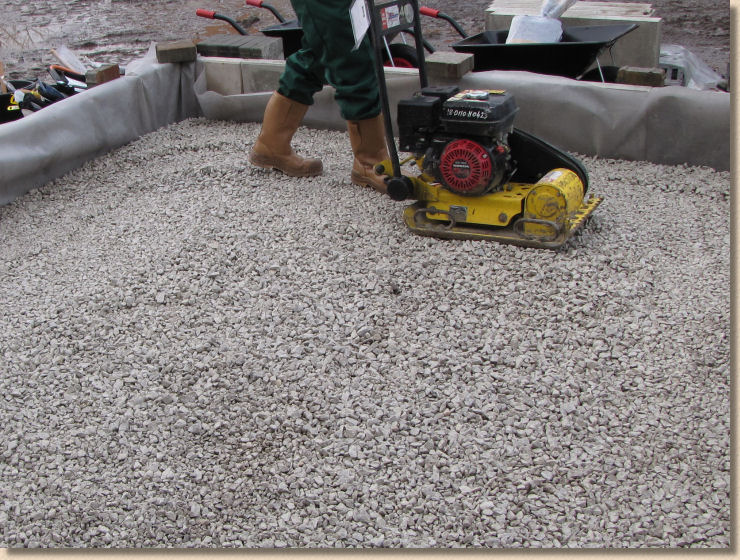
The laying course material is spread and levelled to create a relatively regular bed of 50-60mm depth....
....which is then lightly compacted. As with the sub-base, there is very little settlement despite the efforts of the vibrating plate compactor.
Screeding:
Screeding creates a smooth and even bed onto which the blocks will be placed. Screeding of a permeable laying course is carried out in exactly the same way as would be used for a conventional laying course of sand or grit, using screed boards or specialist tools as suits the job in hand.
However, because there is so little settlement with a permeable type laying course, the amount of surcharge will be reduced (compared to conventional paving) and so the setting of screed level may not be the same as would be used for, say, a 60mm block on grit sand.
Accordingly, a little bit of trial and error may be required to determine what bed level is required to give the desired finished pavement level.
Read more about setting screed levels
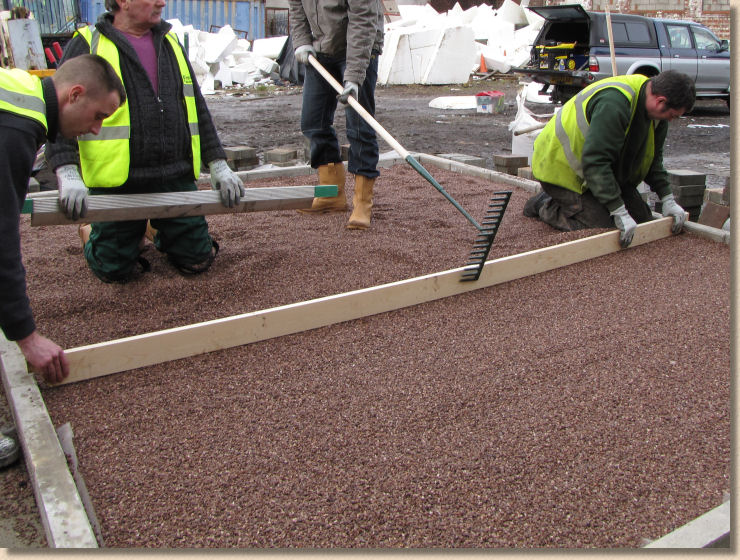
And as with conventional paving, the screeded laying courses will probably require some titivating, particularly at the edges and in the corners, to create that perfect bed.

This final preparation of the bed is usually carried out using a float trowel or a short screeder board.
Laying blocks:
The most important thing to note is that blocks for permeable pavements are NOT the same as blocks for conventional pavements. CBPP blocks usually have larger spacer lugs designed to create extra-wide joints through which the surface water can drain.
However, despite the difference in block format, the method of laying is reassuringly identical to that for conventional block pavements.
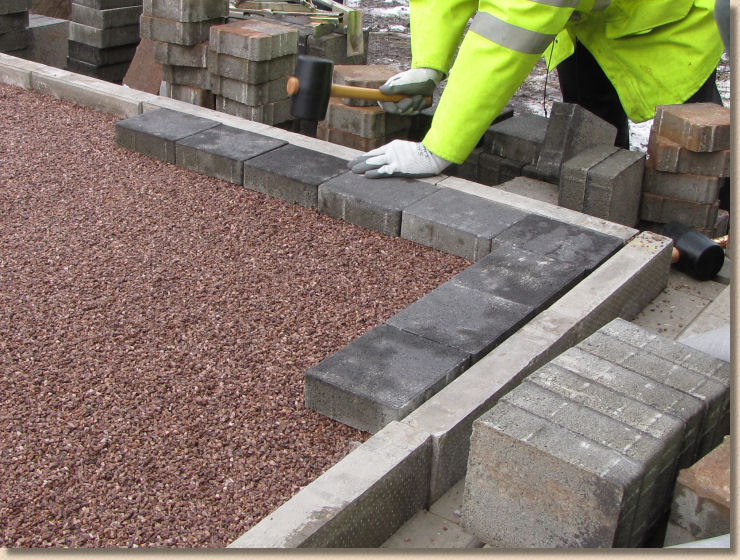
So, we start by laying the edge courses, even though they have only a decorative function on this project....
....and then the body blocks can be laid, just as normal....
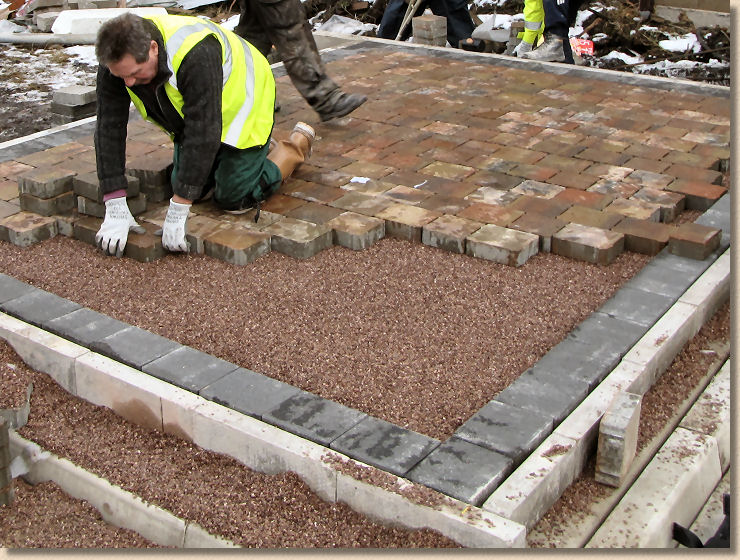
....and there's no reason why coverage rates for operatives should be any lower than those for comparable formats of conventional block paving.
Cutting:
Almost inevitably, some blocks will need to be cut to fit the panel being paved.
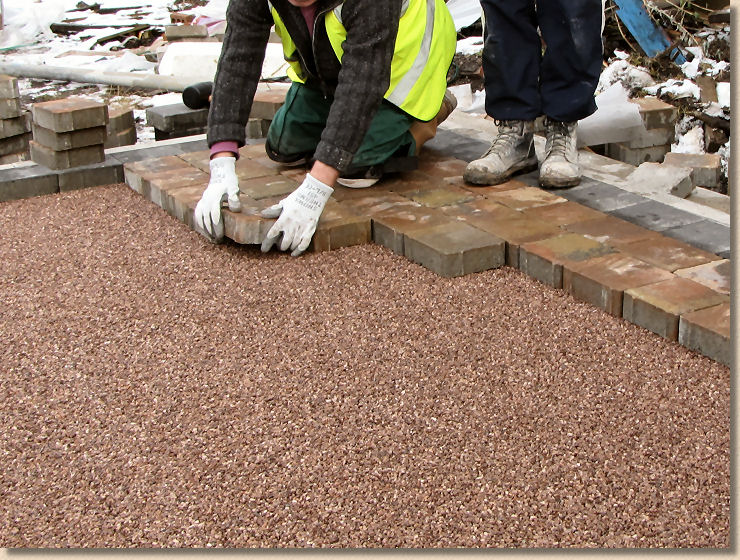
On this project, the closing edge, which is the last course of body blocks to be laid, will all need to be cut to the same size. Rather than cut each block individually, the blocks are marked in-situ and then cut as one continuous line....
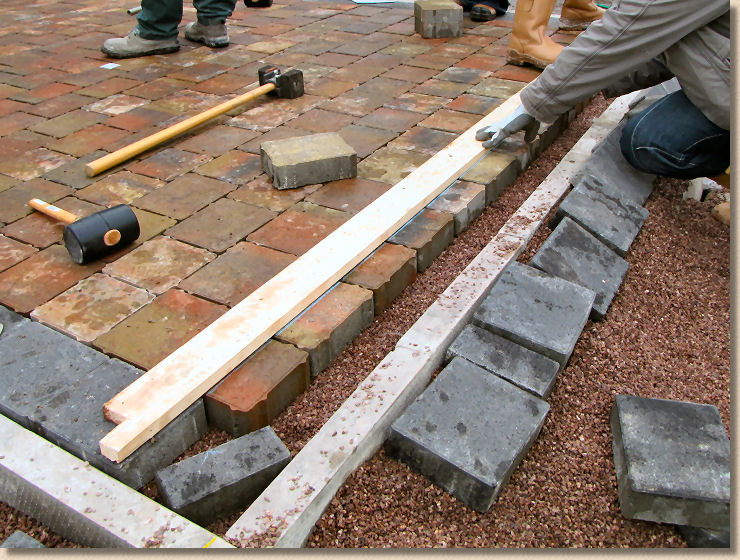
An operative uses a straightedge to act a s a guide to marking the body blocks (multicolour) so that the panel will exactly accommodate a full edge course block (charcoal).
Note how the edge course blocks have been positioned outside the panel, ready to be re-laid once the cutting is complete.
The operative dons a suitable face mask to protect him from dust, plus safety eyewear and gloves. The cut-off saw is connected to a water feed pipe and the blocks are then cut using a diamond blade in one smooth operation.
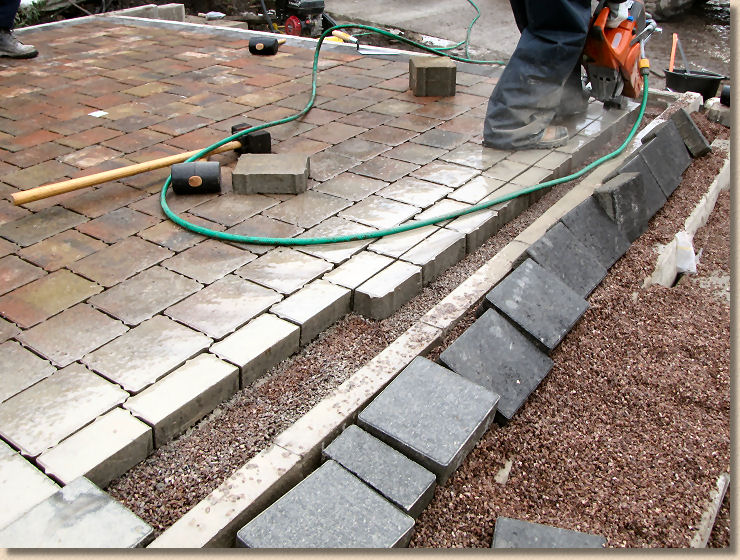
The water spray immediately damps any dust generated by the cutting process. Dust suppression such as this safeguards the operative's lungs, and those of his fellow operatives, but does produce a fine wet slurry which MUST be washed off the blocks before it has a chance to dry and stain.

The cut pieces are set onto the bed and the edge course blocks laid to complete the pavement perfectly.
Compaction & Jointing:
Once block laying is complete, the final tasks are compaction and jointing.
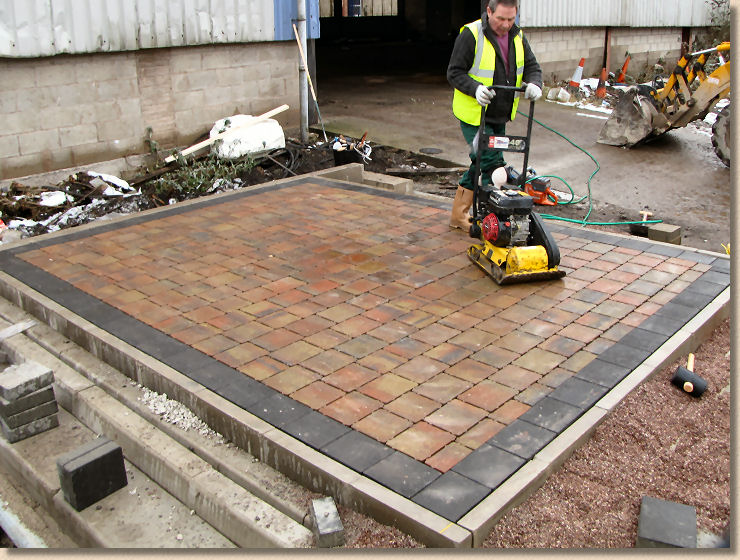
With conventional pavements, there is often some debate about whether to jint first or compact first. With permeable paving, the accepted principle is to compact first, mainly because the jointing material is so coarse, relatively speaking.
As we saw when compacting the sub-base and laying course materials, there is very little settlement with a permeable pavement, so a couple of passes with the plate compactor will settle the blocks just about as far as they will go for now.
Next, the jointing grit is applied by scattering it onto the surface and sweeping it into the empty joints....

....it will readily settle into the gaps where it creates the vertical interlock which gives the paving its load-bearing strength.

A final pass with the vibrating compactor will settle the jointing in place, but make sure any surplus is swept off the surface first as those small stones will scratch the paving blocks if they get trapped beneath the plate.
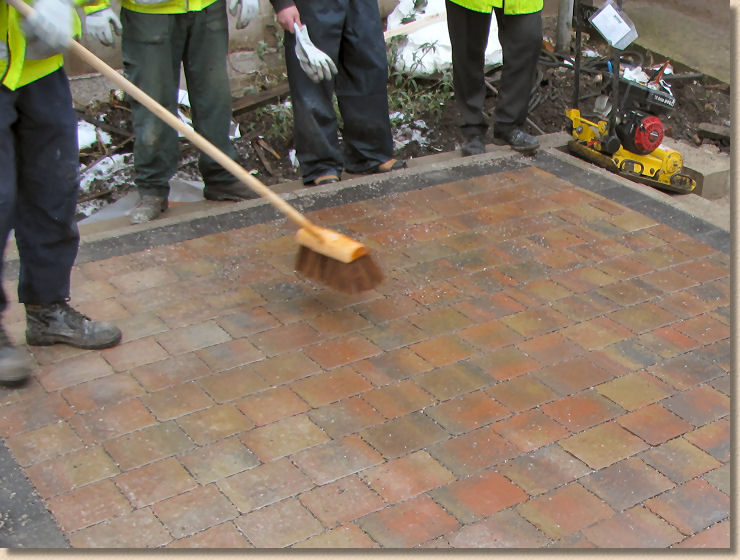
A final brushing completes the project.
Finished:
The pavement can be used immediately, either for foot traffic or for vehicles. It may take some time for the sub-base reservoir to fill, if it does at all (on very free-draining ground, it may never achieve more than a few centimetres of water in the sub-base)
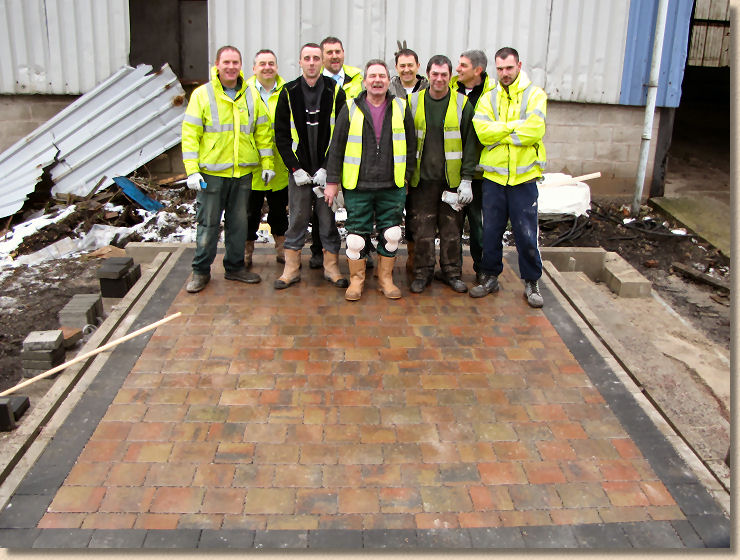
Well done lads! Oh look: there's always one!
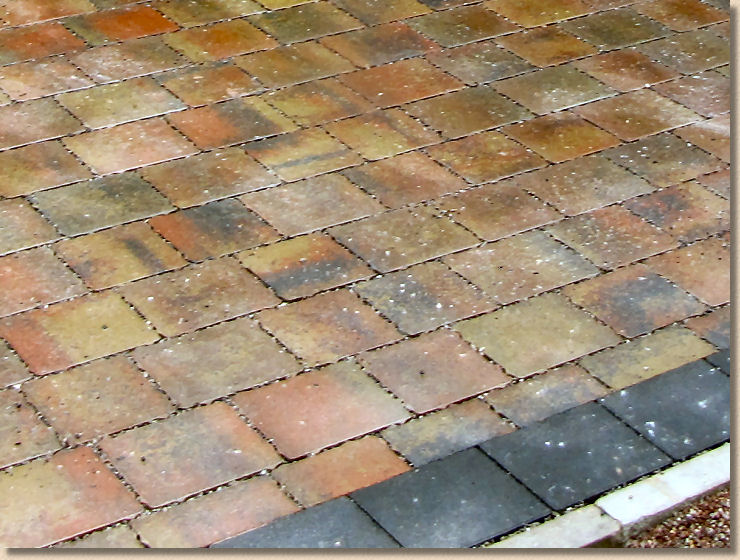
And the one thing about permeable pavements is they never, ever suffer from puddles!