Spades and Shovels:
There's hell of a lot of digging-work in the groundworks trade, and so a good spade is possibly the most important tool of all. We rely of different types of spades and shovels to perform different jobs - these are the main ones....

Tapermouth spade
If I could have only one digging tool, this would be it. The tapermouth is, for me, the best digging spade available. It gets its name because the blade tapers slightly, so it's narrower at the cutting edge than it is at the shoulder. A great, all-round tool.
Widemouth shovel
Also known as a "Squaremouth", this is a handy tool for shovelling and levelling, with its wide business end. However, it's not as good as a tapermouth for digging, especially in hard or clayey ground. Popular with brickies and other 'above ground' trades.


Grafter spade
This is a handy tool for digging-out fence posts, or working in tough, boulder clay. It's is very narrow, only 100mm or so wide at the cutting edge, with a tapering blade. Not many uses at ground level, as the extremely narrow blade make it all but useless for shifting material, but a god-send when trying to work around roots or cables.
Trenching Spade
A hybrid between a tapermouth and a grafter, this is a narrow spade that we find useful for working in trenches. Its narrow profile makes it good for cutting through tough soils, but being a bit wider than a grafter, it can carry a reasonable amount of excavated material out of the way.


Roundmouth shovel
Some folk swear by this type of tool, but I find them awkward. They are fine for shovelling sands and gravels into a mixer when making concrete, but are no use at all for preparing a bed for flags or levelling out sub-base material. Sometimes seen with a longer, plain handle, and claimed to be brilliant for digging tasks, but that isn't my experience!
Irish shovel
Widely used throughout Ireland, this is one of those yokes that you have to grow up using to really understand how best to use it. In the hands of a novice, or even when used by someone more familiar with a D- or T-handled spade, they can be awkward and unwieldy, but in the hands of a regular user, they are a tool of superb finesse. I'm less impressed with them as a digging tool, but for shifting and levelling loose aggregates, they have no equal.

Handles
There are two main types of handle, and they are illustrated opposite. On the left is the D-handle, also known as a Y-handle, because of the way it forks, and on the right, the T-handle.
Anatomy of a Spade

There's little to choose between the two, although my personal preference is for the D-handle, which I have found to be more comfortable, stronger and less likely to break than the T-handle. On some spades, the T-piece has worked loose when wrenched with a twisting force, whereas the D-handle seems better able to cope with such stress.

Shovel or Spade?
So? Is it a shovel or is it a spade? What's the difference, and does it matter? Well, quite frankly, does it 'eck! You might call a spade a spade, but lots of folk call a spade a shovel, and vice versa.
My dictionary reveals that a Spade, from the Old English spadu or Latin spatha , is a "long-handled digging tool with a flat blade that is pressed with the foot", while a Shovel, from the Old English scofl , is a "long-handled tool with a broad scoop or blade used in lifting and moving loose material".
So that's that - you dig with a spade: you shift stuff with a shovel. Clear as mud, eh?
Other digging tools
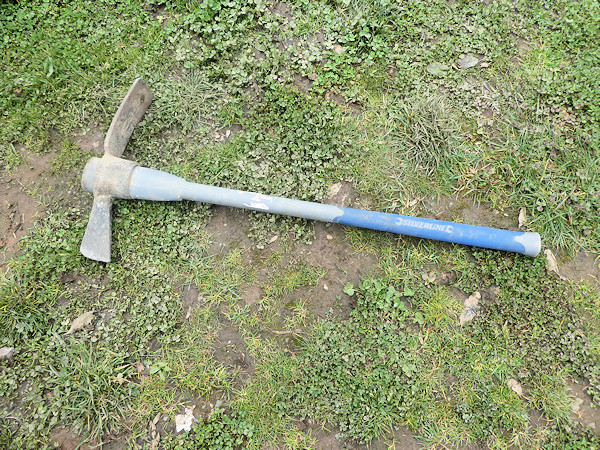
A pick axe is another essential tool in the groundworker's armoury. Ideal for breaking up tough ground, ripping up old flags, smashing up concrete, levering and other grubbing jobs. Picks are one of the oldest known human tools - the earliest examples were formed from deer antlers and used to grub out edible roots from the ground. The modern pick consist of a hardwood shaft, usually hickory, with a tough, forged steel head.
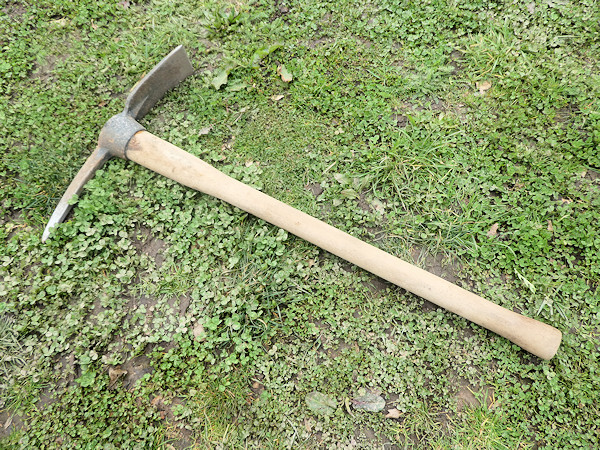
The typical format is "Point and Chisel" - one end of the head is tapered to a dull point and the other is broadened out to a chisel, although there are many variations - some chisel-ends may be vertical, more like an axe, and some pick-heads may consist of two chisels, one vertical and one horizontal (sometimes referred to as "English Pattern").
One variation on the pick-axe is the Mattock, from the Old English ' mattuc '. This tool tend to be slightly smaller than typical pick-axe with at least one end of the head considerably broadened out. This is a great tool for breaking-up soils and clay or for levering out awkward roots, tree stumps or fence posts. Again, an "English Mattock" has one horizontal end and one vertical, axe-like end.
Mauls and Mallets
Mauls are the big hammers used to knock down pavings. Sometimes written as 'Mall', which seems to be a shortened form of 'Mallet', they are definitely pronounced "Maul" (rhymes with Paul) rather than "Mal" (to rhyme with 'Pal') and the term apparently derives from the Latin ' malleus ' - a hammer.
For many, many years, right up until, as a young boy in the 1960s, I started accompanying my Dad onto the sites, mauls were always made from wood. They usually had two hoops of iron that would be heat-shrunk around the wooden head to help prevent it splitting during use. However, rubber composite mauls started to become popular about that time, as they were generally kinder to the flags and kerbs .
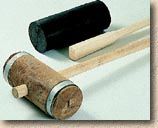
There seems to be two common types of composite mauls: fibre-reinforced rubber that is quite dense and surprisingly hard-wearing, and solid-rubber mauls. We find that the solid-rubber type has a tendency to split when giving a particularly awkward flagstone an almighty wallop, and they occasionally leaves marks on concrete flags and kerbs. The rubber'n'fibre mauls seem tougher, more resilient and give years of trouble free service.
Indeed, I still have the rubber'n'fibre maul I started working with when I left school in 1977. That's it on the left; it's worn a bit, and has a few scars from the blades of errant Power Saws, but it's still perfectly serviceable and has laid in excess of 70,000 m² of flags and 400 Km of kerbs in its time!
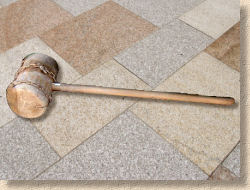
The traditional wooden mauls, sometimes referred to as "betels", are still available today, and are actually preferred by some tradesmen, but not this one!
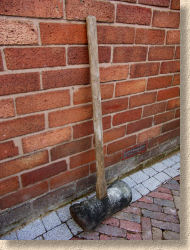
They seem to more popular in London and South-East England than they are up here in t'north. Having the craic with flaggers in the Capital reveals that the wooden mauls are still as prone to splitting as ever, except nowadays, the iron bands are much harder to replace - most tool stockists will only supply complete mauls, and will not or cannot supply spare bands. That's why the wooden maul on the right, belonging to a London based cable and paving gang, is held together with two lengths of chain!
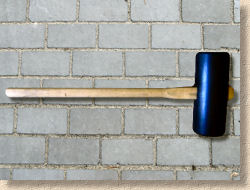
While full-sized mauls are ideal for persuading 100mm thick Yorkstone Flags into place, they can be a bit cumbersome for more delicate work, such as block paving , where the lighter 'block hammer' shown above is a more versatile tool. We also have mini-mauls, or "rubber mallets" - we call them "Clonkers" on site, as they are used to "clonk" bricks into place.
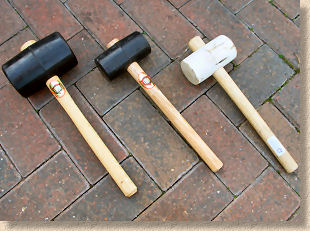
They come in various sizes and two main types - those with a shaft that passes right through the head, and those that have a head that sits atop the shaft. We find the through-shaft types have a longer life than the other type. There is one type that features a small nail fastening the head to the shaft, as shown on the right. These have the knack, without fail, of splitting in two the first time they have been used with any force, and are best avoided.

A handy tool to have, and not just for paving! It's one of those yokes for which you'll soon find a hundred other uses.
Hammers
Hammers are another vital piece of kit in the paving trade. There used to be a vast range of hammers available, but the specialist masons' hammers are quite rare nowadays, and I spent over 3 years looking for a replacement Goat's Head Hammer a few years back. So, most tradesmen now rely on two or three basic types of hammer, most important of which is the Lump Hammer, aka the Club Hammer.

It's cheap, it's ubiquitous, it's reliable and it does the job. The lump hammer comes in a few basic sizes, or, more accurately, weights - ranging between 2lb (0.9kg) and 4lb (1.8kg). A 2lb or 2½lb (1.1kg) is the most comfortable to work with, but the 4lb beast is handy when working with heavier materials, such as natural stone .
Replacement shafts and heads are available, resulting in the legend of "Murphy's Hammer" which he claimed to have had for over 30 years. It had had 12 new heads and 16 new shafts, but he'd had the same hammer for over 30 years!
However, these hammers are now so cheap, often under a tenner, that most tradesmen will replace the entire unit rather than fit a new shaft to the head or vice-versa.
Two other handy hammers often found in the tool buckets of many a Pavior , are the Brick Hammer and a Scutching Hammer. Both are also commonly used in the bricklaying trades. The brick hammer features one chisel end that is useful for snapping or trimming bricks, while a scutching hammer holds removable 'combs' or 'blades' and is used to 'scutch-off' old mortar or pitch from pavings (and bricks!)


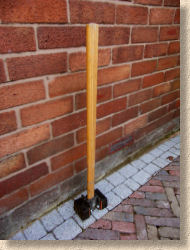
The final hammer in a good tool kit is the Sledge Hammer, a heavy hammer that is also known as 'The Persuader'. They come in a variety of sizes, all based on head weights - 7lb (3.2kg) is the lightest of the sledge hammer family and then there's a 10lb (4.5kg), a 14lb (6.3kg) and a 20lb (9kg) monster that you really don't want to use all that often!
Invaluable for breaking up old concrete, or any solid mass that needs reducing in size, sledge hammers are also handy for snapping road kerbs once they've been scored, demolishing old walls, driving stakes into the ground and 101 other tasks around the site.
Chisels
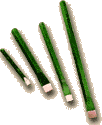
There are 3 basic chisels used in the paving trade - Bolster Chisels, Pitching Chisels and Cold Chisels.
You can read more about their uses in the Cutting with Hand Tools section of this site.
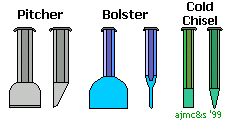
Bolsters:
Bolsters are used to clean off stone and other pavings. They have a wide cutting edge, ranging from 30mm up to 100mm, and the blade is relatively thin - see sketch. They are sometimes used to cut pavings , but they aren't as reliable as a Pitching Chisel for this task. The wide cutting edge is useful for smoothing off a rough-cut face, and for cutting out channels in a concrete floor or wall.

Pitchers:
These are becoming increasingly rare as more and more Paviors come to rely on Power Saws rather than hand tools for their cutting tasks. They are primarily used to split flags or kerbs, both concrete and natural stone, and to 'pitch' the face when dressing stone.

I know of only 3 outlets in Northern England that still supply these tools - if you know of anywhere else, I'd be delighted to hear about them.
Cold Chisels:
These are the work-horses of the chisel family. They are used for cutting, trimming, shaping, forming, smoothing, carving, breaking out, and almost any other job that involves using brute force to affect stone or concrete.
The standard cold chisel has a simple chisel end, usually the same width as the shaft. They come in a range of widths, from tiny 6mm fine detail chisels to 50-60mm wide "drifts" as used at the business end of a jack-hammer . There are also chisels that come to a point - these are known as "Punches", and special chisels that hold combs and other stone-dressing 'bits', but, as with the Pitchers mentioned above, these too are becoming increasingly rare.
Trowels and Floats
Trowels are an essential tool for any half-decent contractor. Although there's less mortar pointing work done since the rise to dominance of block paving , trowels still have their uses, and should be included in every basic tool kit.
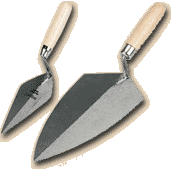
Two essential trowels are a decent Brick Trowel and a good Pointing Trowel. The Brick Trowel has a large blade, up to 300mm in length and is used to butter mortar onto flags, as well as for general bed levelling, and, of course, bricklaying. Without doubt, the best Brick trowels in the world are Marshalltown . They ain't cheap, but, if they're properly looked after, they'll last a lifetime.
Pointing trowels are much smaller, with a blade around 75-150mm. They are used, as the name suggests, primarily for pointing, but they are also handy for cleaning out tight corners, such as in manholes.
There's nothing more certain to knacker the wrists and make the arms ache than an uncomfortable trowel. If there's a lot of mortar work to be done, it's worth checking out a few different trowels and finding one which suits your hand. A good trowel has a chunky, curved handle that fits snugly into the palm, and the trowel as a whole should have a good sense of balance. The blade should be bright steel, at least 1.5mm thick and have a high-pitched ring when struck. Look out for shoddy welding of the blade to the neck, or a loose ferrule. Remember, the way a trowel feels in the Tool Shop is not the same as it will feel when it's laden with mortar. Floats are used mostly with concrete work, but they can have other uses.

Bull floats are normally used to smooth and finish wet concrete, after it's been levelled and tamped. Large bull floats may be attached to extendible handles known as booms for use when floating larger areas of concrete, but the example shown opposite is a typical hand model.
We also find them very useful for smoothing out screeded bedding layers, especially when preparing complex areas, infilling channels where the screeder rail/trammel bars were positioned, or small spots where a screeder bar wouldn't be able to fit.
Arris Trowels are only used with concrete work. They are used to form the rounded edges that help minimise spalling and fracturing of the concrete bays. They can also be used to form grooves for control joints.

Levels
Setting levels is one of the fundamental tasks for any paving or drainage project. When establishing levels over a site, we would use an Automatic Level or a Laser Level , but for small-scale works, and when checking verticality (plumb), a spirit level is the tool to use.
Their name comes from the fact that the vial (aka "Bubble Tube") contains a coloured "spirit" and a bubble of air. The body of the tool is adjusted until the bubble within the vial is aligned between the two guide lines, and then the spirit level is said to be flat (or plumb).

A good tool kit would have a couple of spirit levels - full length "Long Level" and a shorter "Boat Level". All spirit levels rely on the accuracy of the vial set within the body, and the longer the body, the less error there will be. All spirit levels should have at least two vials - one for horizontal readings and one for verticals (plumb).

The Long Level best suited to groundworks is a 1200mm long model. Long enough to be reasonably accurate (we expect an accuracy of at least 0.5mm per metre) yet not so long that it is cumbersome. It is also a handy rule for marking straight lines when cutting, and can also be used as a short screeder bar.
The Boat Level (so named because of the shape) is used to check horizontality of kerb tops and other short checks where the Long Level might be too large or clumsy. Boat Levels, being shorter, tend not to be as accurate as Long Levels - 1mm per metre is a good standard.

Barrows
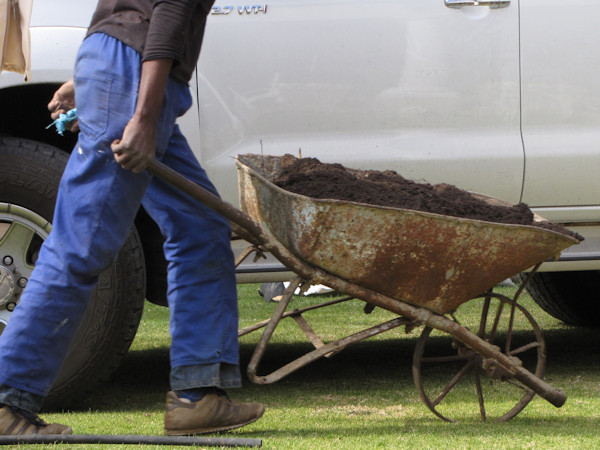
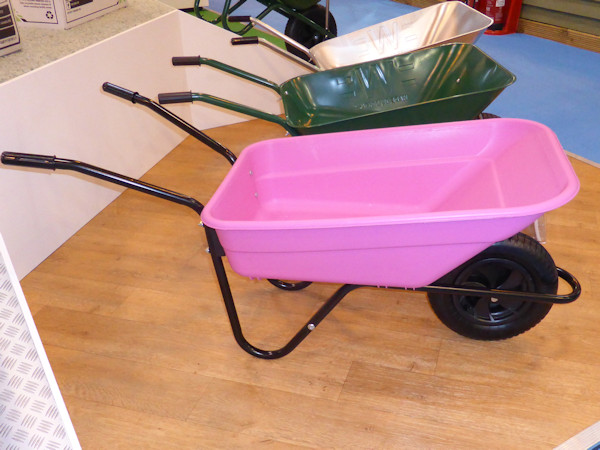
When it comes to moving muck, sand, stone or blocks, there's nowt handier than a barrow, but, there are barrows and there are barrows . A builder's barrow is a good all-round piece of kit, made from steel with a pneumatic wheel, whereas the flaky, shaky solid wheel pathetic excuses often touted as 'Garden Barrows' are a waste of good tin, and will not last more than a couple of days on site.
There are single-wheeled builder's barrows, and there are twin-wheeled barrows, sometime called Road Barrows or Navvies' Barrows due to their being popular on streetworks. While the twin-wheeled barrows are very stable and a good tool for shifting materials around on a level site, the single-wheeled type is probably more versatile on open ground or for everyday use. While the capacity of the twin-wheeler is often admired by the gangerman, the labourers are not always as pleased, as it's them that has to push and tip the damned thing!
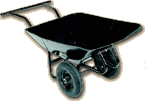
The skip of a barrow is manufactured by one of two manufacturing methods: it will either be pressed or it will be cut'n'folded. The pressed skips are manufactured by pressing a sheet of thinnish steel over a former, so the finished skip is a single 'pan' with no joints. Cut and Folded skips are manufactured from a sheet of steel that is cut to a precise shape and then 'wrapped' or folded to form the classic skip shape. In our experience, cut'n'folded barrows tend to be made from a thicker gauge steel, and are tougher but heavier than pressed skips.

The chassis is normally formed from tubular steel. There are dozens of configurations but most are a single tube, bent to shape, to which the skip is attached either by welding or by bolting. Welds can snap, while bolts can wear away at the fastening hole, until the head of the bolt pops through, which means the skip is no longer properly attached to the chassis. Also, having the bolt head protruding from the base of the skip means they can catch on a shovel that is being used to mix mortar in the barrow. Overall, we prefer welded skips.
Finally, wheels. Only a pneumatic wheel is suitable. Solid wheels may seem a good idea as there's no chance of picking up a puncture, but, boy, can they be bloody hard work to push, especially over rough ground! Most contractors will carry a spare barrow wheel with them so that when a barrow gets the inevitable puncture, work isn't delayed while a labourer is despatched to get a repair done at the local Tyre Depot.
