Introduction:
Whether it's an unbound sand or grit, a cement mortar, or anything else, this page looks at what is used, what benefits it brings, and how it should be laid.
Nowadays, the bedding used for flags/slabs is more correctly known as the "Laying Course" but many contractors and even a few engineers still refer to it as the bedding: the material onto which the flags are bedded: The flags lie on the bed - it has a certain verbal logic which is lacking in the phrase "Laying Course", so we'll stick with the old terminology for the remainder of this page but acknowledge that the bureaucrats (who love to justify their existence by renaming ideas and materials that have managed to survive for hundreds of years under their previous name), and the pedants, may prefer to talk exclusively of the "Laying Course".
The bedding is the layer within a pavement structures that allows the paving to be placed over whatever lies beneath, whether that’s a sub-base , a sub-grade or even something like a pre-existing concrete base . It "cushions" the paving units, and accommodates any variation in thickness there might be in the paving units themselves, to ensure that the finished surface is smooth and even.

In order to be able to carry out these functions, a material that is granular in nature is required, because such a material can be spread and levelled as required to suit the site. However, a granular material that’s too chunky would not be satisfactory. On a separate page , there is an explanation of sub-base materials and how the thickness of the sub-base layer needs to be roughly twice that of the largest sized aggregate. Given that a bed (or laying course, if you prefer) usually has a thickness somewhere between 20mm and 50mm means that anything larger than 15mm would be inappropriate. However, a 15mm aggregate would make it difficult to create a bed that may need adjusting by two or three millimetres to compensate for variation in the thickness of the paving units.
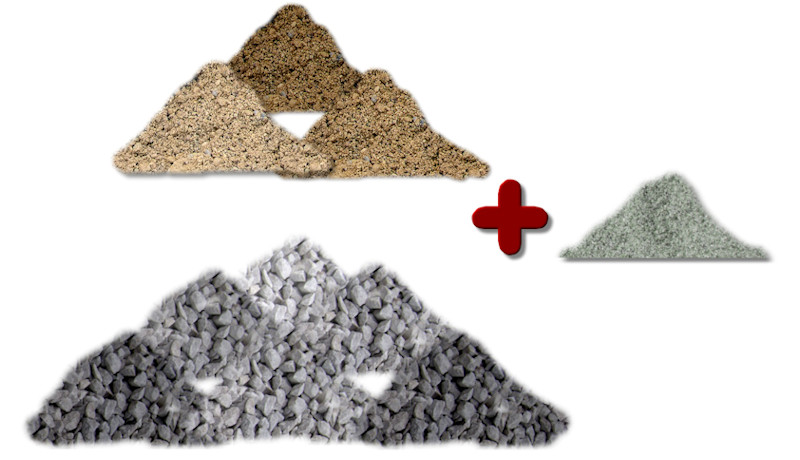
Which is why sand, as clean sand or mixed with cement to make a mortar, is the most popular material for use as bedding, particularly for the larger flags.
Bound or unbound?
There are two classes of bedding material: hydraulically bound and unbound. Hydraulically Bound (HB) materials have the loose aggregate (the sand) held together by a binder, most commonly cement or hydraulic lime, while unbound material, unsurprisingly, have no binder present, meaning that the loose aggregate (sand) remains loose.
There are pros and cons to each type of bedding:
Unbound
Bound
As a very, very general rule, flags 450x450mm or larger are usually laid on a bound (rigid) bed, while those of 450x450mm or less are often laid on an unbound (flexible) bed. However, there are many examples of smaller flags being laid on bound bedding and larger flags being laid on sand.
As a very, very general guide, flags specifically manufactured as small element paving, that is, pressed concrete or stone flags with a plan size of 450x450mm or less and a calibrated thickness, and having chamfered or rounded arisses, can be laid on unbound bedding: everything else is better laid on bound bedding.
Unbound
Bound
- Wet-cast concrete patio flags
- Large pressed concrete flags
(450x600mm or bigger) - Indian Sandstone/limestone
- Granite/porphyry/slate for patios
This is not a definitive list: there can't be such a thing as a definitive list because sites and circumstances vary so much, but it is a reasonable general guide.
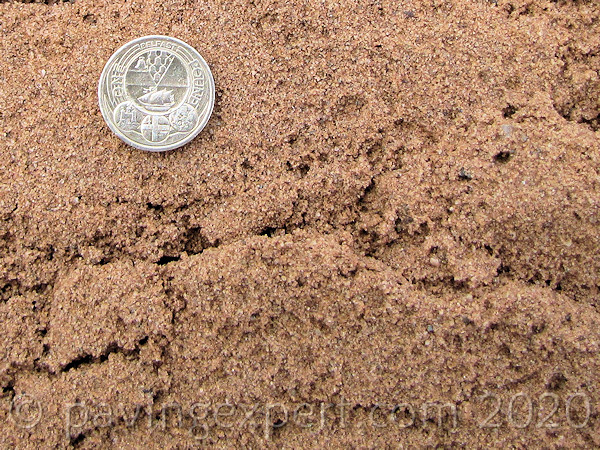
Unbound - Sand:
It's not a good idea to use any old sand that happens to be available. The sand needs to be salt-free otherwise it could damage the pavings that will lie on top of it, and so those sand obtained by marine dredging need to be washed.
The sand also needs to be free-draining to prevent liquefaction of the laying course. Finally, the selected sand should have a low clay/silt content, as this will affect its ability to drain freely.
The correct type of sand is what is still generally known as a Class M sand (now referred to by the slips-off-the-tongue title of...
"Gf 85 0/4 (MP) Fine Aggregate to BS EN 12620:2002) "
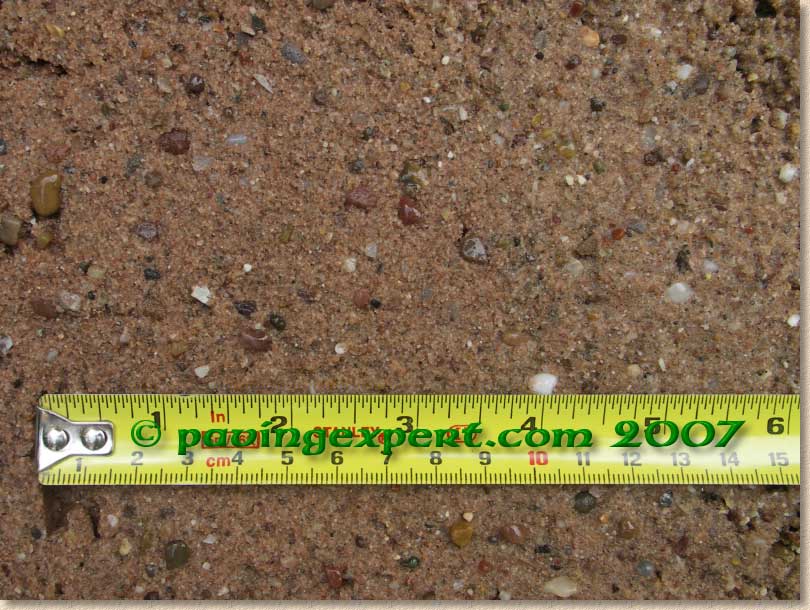
aka grit sand, coarse sand, concreting sand, sharp sand
This is the type of sand used to make ready-mix concrete, which is why it is sometimes known as Concreting Sand. It might also be known as sharp sand, grit sand, or coarse sand.
The three key factors in determining the suitability of a grit sand are:
- The individual grains are angular in nature, thereby creating an interlock between adjacent grains.
- A higher proportion of bigger grains reduces the amount of water that can be retained by the sand, making it very free draining
- A very low silt and clay content, which again makes for a free-draining material
So, the ideal sand is a free-draining, gritty sand that does not retain water.
Unbound - alternatives:
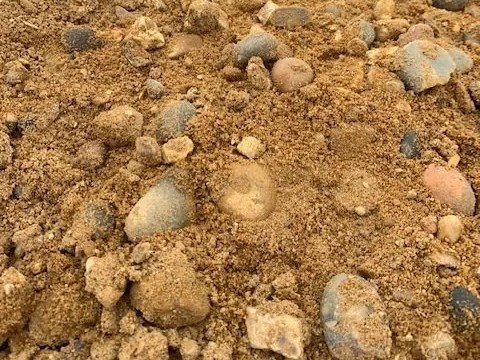
All-in Ballast:
There are problems in certain parts of Britain and Ireland obtaining suitable sands and several projects have failed because an unsuitable local sand was used in preference to importing a certificated sand. However, there are some aggregates that may be used when a grit sand is not available for whatever reason.
This is a ‘catch-all term for a material that is popular in the south of England, and, because of the spread of nationwide Builder’s Providers/Merchants and DIY Chains, it is now found on sale in places where it normally wouldn’t be given the time of day. It’s a mix of sands and gravels, but it’s an unregulated mix: there are no limits on how much of it has to be a sand and how much has to be a gravel. So, you can end up with an All-in Ballast that is nearly all sand, or one that is nearly all gravel. However, most of the time, the batching plant mixes the material pretty thoroughly before moving it on to the bagging plant, and most samples will contain a reasonable mix of sands and gravels.
Crushed Fines:
Fines are, essentially, rock dust. This material tends to be used in parts of the country where natural deposits of sands are few and far between, but where there is a strong quarrying presence that produces ‘fines’ as a by-product of the rock crushing process. The Scottish Highlands are probably the best example of such an area.
The parent rock is very important in determining the suitability of the fines for use as a laying course material. A limestone (not that there are many limestones in the Scottish Highlands) produces fines that can turn quite pasty when wet and so would not normally be suitable. A granite, such as those quarried on several of the Western Isles, produces a wonderfully gritty fines material that is eminently suitable for use. Similarly with gabbros and diorites and most of the igneous and/or metamorphic rocks of Scotland and Northern Ireland.
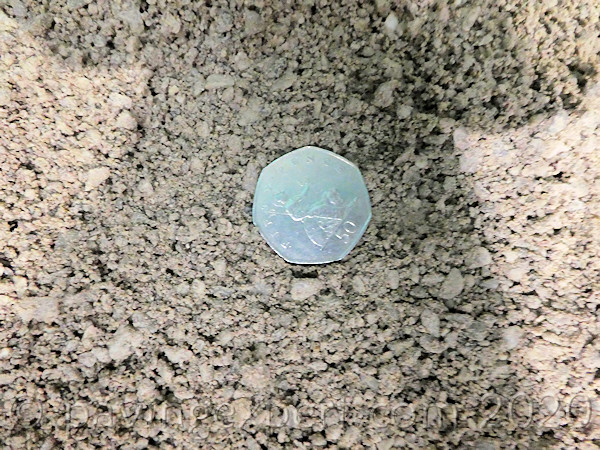
As with the sand, the key feature needed is a gritty, free draining, granular quality.
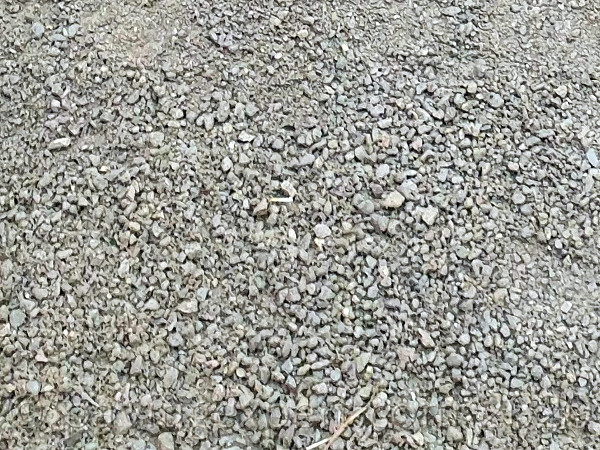
Whin and grit:
These materials are pretty similar to the crushed fines, except they are produced from particular parent rocks; whinstone, in the case of whin, and a gritstone or quartzite in the case of grit. Whinstone is reasonably popular in north-east England and in Scotland. It’s actually a basalt or a dolerite, intruded when the region around Ardnamurchan was volcanically active many millions of years ago, If you were to take those hexagonal blocks up at Giant’s Causeway, and crush them down to a 1-3mm particle size, you’d have a pretty good whinstone!
Once again, we are looking for a gritty, free-draining, granular material, roughly 4mm to dust.
Unsuitable sands:
What is NOT suitable as a laying course material is any form of Building Sand. This is the sand used to make a bricklaying mortar, and it may be known by a range of other names: soft sand, masonry sand, plastering sand, pointing sand: any of these are NOT suitable.
And there are three key reasons why they are not suitable:
- the grains tend to be rounded, so they roll around with each other instead of creating an interlock.
- the small grain size enables them to hold a relatively high water content, making them ideal for mortars but bloody awful for laying courses.
- they have a relatively high clay and silt content, which again makes them less free-draining than is required.
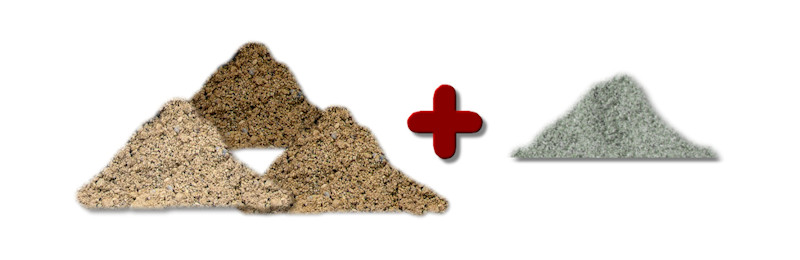
Cement-bound material:
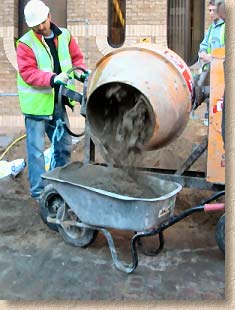
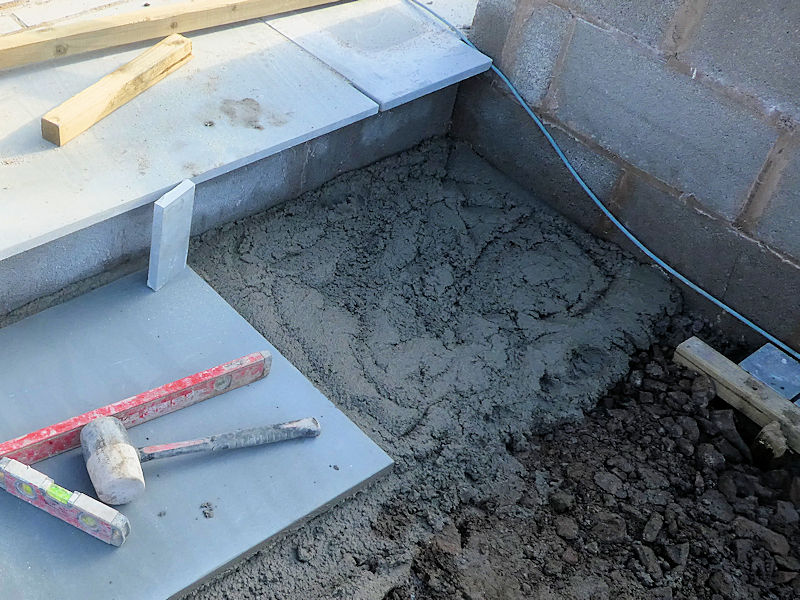
Using clean sand (that is, sand with no cement) as a laying course is all well and good, and is a method still used on many larger commercial projects, but it does require a significant degree of skill to ensure that the sand itself is fully compacted when the flags are laid. If the sand is only partially consolidated when the flags are laid, it will continue to settle due to gravity and trafficking, and so the pavement becomes uneven and loose and unsafe.
Consequently many contractors prefer to lay on a mixture of sand (or other fine aggregate) and cement, rather than on clean sand.
There are good reasons for doing so, not least of which is the fact that a sand/cement mix is a more forgiving material. The cement content binds together the sand grains and therefore any partial consolidation will not result in movement of the flags. Consequently, the degree of skill required to make a bed that will be ‘perfect’ is much reduced compared to that needed to make such a bed from sand alone.
There are other advantages: bound sand (that is, sand bound together with a cement) can't be disturbed by sub-surface water flow; it can't be mined by ants and other invertebrates; it provides full and even support for the flags. That's why sand-and-cement bedding is probably the best laying course material to recommend to low-skill contractors and all DIYers.
But what sort of sand and cement? Can any old sand with a bit of cement stirred through it be used? Should it have a sloppy consistency, like a bricklaying mortar?
Although many contractors (and a number of gormless TV presenters) have their own "recipes" for a bedding mortar, the best performing mortars for residential and non-critical paving projects, over the longer-term, are those based on the same grit sand considered above : a gritty, free-draining, concreting sand.
Some contractors will say they use half-and-half building sand with grit sand because it makes the mortar stick to the underside of the flags. There are far better methods of achieving a bond between laying course and paving unit, such as Bond Bridges . What is really needed from the mortar is workability, consistency of mix, and strength: the addition of building sand makes for a weaker mortar.
BS Compliant laying course
The latest edition of the relevant British Standard (BS 7533:4 2006) requires a laying course of specific characteristics that are, for many projects, completely unrealistic, over-the-top and heavily skewed towards the use of proprietary pre-batched mortar products. While these products are fully justified for some commercial projects, they are totally unnecessary for the majority of residential paving projects. To require a mortar with a compressive strength of 30Mpa for a patio, is, quite frankly, taking a break from reality!
A typical 30Mpa pre-batched mortar costs £1,000 (€1,100) per tonne at 2017 prices - that's 50 quid (60 Euro) per square metre for the bedding, if you use 50mm thickness. How realistic is that in a market where the typical cost of the remarkably popular Indian sandstone flags averages only 20 quid (25 Euro) per square metre?
The madness doesn't stop there: the same standard recommends a slump of 150mm (think of a mortar with the consistency of pea soup), and requires both the base and the underside of each and every flagstone to be primed with even more of this over-priced mortar. Those wanting to attempt floating their flagstones on a mortar broth, as required by the BS-recommendations, are welcome to try but they pretty soon come to realise the impracticality of such a high slump.
The remainder of this page will consider "real life" practice.
Permeable Bedding Mortars
One aspect of the British Standard (BS 7533:4 2006) mocked above that does make sense is the use of permeable mortars for the bedding of some commercial and public pavements.
There are even situations, mostly related to the type of paving being laid, where permeable mortars make sound sense for smaller projects such as patios and driveways.
Changes in the way paving is specified, and the materials that are used for jointing, are driving the increased use of these permeable bedding mortars, particularly on commercial projects, streetworks and some industrial sites.
Accordingly, a separate page examining the reasons why they are used, along with an examination of how they are prepared and how they are used on site has been created.

Standard Bedding Mortars
For paving projects that don't need to meet the exacting requirements of BS7533:4 2006, here are three mortar mixes plus one concrete mix that we've been using for in excess of 40 years. One of these should prove adequate for most 'typical' projects.

Certain pale or light-coloured flagstones have been found to become discoloured when laid onto, or jointed with, a standard mortar. Consequently, a special "colour neutral" mortar is normally recommended when working with such materials.
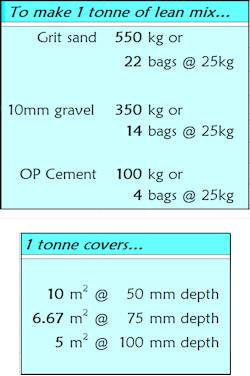
10 units ballast replaces 6 units of gravel plus 4 units of grit sand.
Avoid contact with wet cement, mortars and concretes. Always wear protective gloves and wash off all tools when finished.
Why such a weak mix?
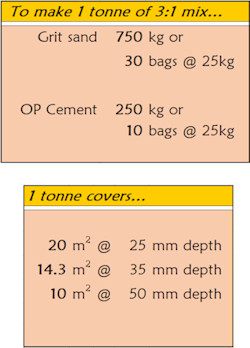
This question regularly comes up. So many manufacturers, distributors, contractors, lesser websites and various talking heads rattle on about using a 4:1 mix as bedding mortar for flagstones used on patios, or even a 3:1 mix….but do they explain why they believe such a high strength, cement-rich, and expensive mortar is required?
The British Standard advocates a 3:1 mix, but then, the main target for the British Standard is what might be considered as ‘public realm’ paving – city centres, shopping malls, office plazas, and the like, and, for such applications, I don’t have much a worry about using such a mortar, but when it comes to back garden patios, the bottom rung of the paving ladder, what is technically a Category 1 pavement, do we really need a mortar with a 28-day strength of 25 Newtons or more? Why? The heaviest load such pavements will carry is a ride-on mower or a kid’s bike!
Consider this: when we install road kerbs, that is, the edge restraints to a public highway carrying vehicles up to 44 tonnes, we typically use a concrete given various names such as “E-mix”, GEN0, or “Kerb Mix” or C7.5 or ST1 for the bedding. Back in the mists of time when I started working with my owld feller laying kerbs in the 1960s, concrete was ordered by mix ratio, so we might ring up the local batch plant and order a two or three cubic yards, as it was back then, of 1:3:6 mix, semi-dry.
The concrete used nowadays is pretty much the same recipe: one part cement to three parts fine aggregate (sand) to six parts coarse aggregate (gravel) with a slump of maybe 25mm. 1 to 3 to 6….or one part cement to NINE parts aggregate.
If that’s good enough for road kerbs, why do we need something with three times the cement content for a back garden patio?
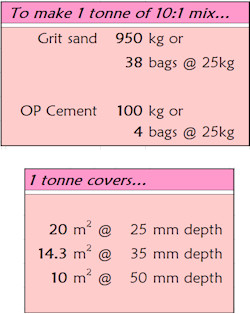
A bedding mortar that is 8:1 or 10:1 is tough enough for the job. Honestly! I’ve been doing it for over 50 years, now. Not only is it tough enough, the lower cement content gives a longer working life for those not as quick at the laying, and, of course, less cement means lower costs and a lower carbon footprint. As the godawful phrase goes, “What’s not to like?”
The increased use of slurry primers with many types of mortar-bedded paving makes even more of a case for leaner mortars. There’s no longer any overriding need to rely on a high cement content in the mortar to achieve adhesion between bed and flag – the slurry primer does that, and with just a 1-2mm thickness of cement-rich material.
Give it a go on your next job. Or try it on a test panel. A thoroughly mixed 10:1 mortar, with sufficient moisture to allow it to bind, properly compacted, will need a pick or a breaker to shift it in a week’s time – so why is that not strong enough for a patio?
Slump
What about the "slump", the wetness of the mortar?
Slump and consistence are explained more full on the All About Slump page
There are three slumps that can be used for bedding paving: semi-dry; moist; and wet. It’s not a matter of one being better than the other - it’s more a matter of finding which type suits the materials, the working methods, and the mannerisms of the poor sod doing the laying. Each will be considered in turn.
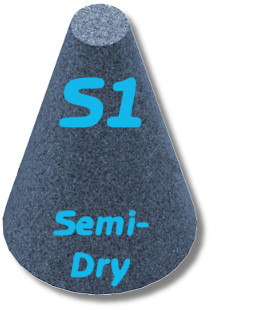
A semi-dry mix contains no added water (or very, very little when the aggregates are particularly dry and dusty). It relies on natural moisture within the sand, in the sub-base or sub-grade, and in the atmosphere, to initiate curing in the cement content. This gives it a relatively long working life, anything from 2-8 hours, depending on time of year and weather conditions. The absence of additional water means that the material is stiff, so when flags are laid onto it and tapped down to level, there’s no ‘floating’, no hitting one end only for the other end to rise up.
It's also provides a clean method of working. The semi-dry mix tends not to be picked up and carried by tools and boots, so there less risk of accidentally staining the flags during the laying process.
One question that comes up quite often in regard to this semi-dry mix, is the cement content. For some reason, people expect a much higher cement content; they think the bedding material needs to be incredibly strong and hard, when the truth is that, for a patio or other pedestrian area, as long as the bedding doesn’t sink and it stays put, that’s all that is really needed. They also overlook that 10:1 is not all that much ‘weaker’ than an ST1 concrete , the old 1:3:6 mix, roughly a 7.5N/mm². That’s the sort of concrete used when laying kerbs on a major highway. If it’s good enough for road kerbs, it’s more than good enough for a garden path or a patio!
A word of caution: this 'slump' can be problematic in hot, dry conditions. If we are having one of our rare 'heatwaves' the natural moisture in the aggregate can be driven off before it gets a chance to hydrate the cement content and you end up with a dry, friable, unset bedding mix. So: if it's hot and dry, use a moist mix rather than semi-dry.

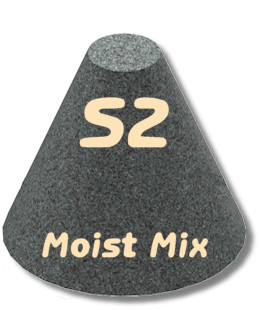
Some contractors, and some DIYers, find it difficult to work with a semi-dry mix. For whatever reason, they can’t seem to get the bed right, and the flags are either too high and end up being cracked when hammered hard to force them down, or they are too low and need to be lifted and re-bedded. Sometimes, by changing to a moist mix bedding, these problems can be reduced or eliminated. By adding a small quantity of water to the mix, the mortar is able to ‘flow’ albeit to a limited extent and so find an accurate level beneath the flag.
Moist mix is only just wet. If you were to pick up a handful (after making sure you were wearing suitable protective gloves, of course!) no water should drip through the fingers when the mortar is squeezed. It should be sort-of halfway between a semi-dry mix and a wet mix, which, as we’ll see, has the consistency of a bricklaying mortar.
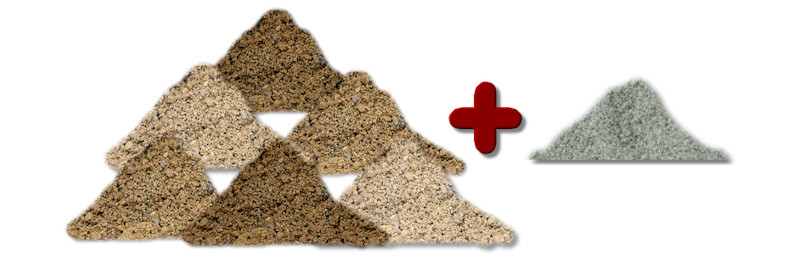
Although there’s no real need, most moist mixes are prepared with a slightly higher cement content than a semi-dry mix: something like a 6:1 mix. possibly an 8:1 mix. The technical reason is all to do with the water/cement ratio , and, without getting into complex concrete chemistry, the more water used in a mortar or concrete, the weaker it will be when cured, and so to counter this, more cement is added to the mix.

While some will find a moist mix better suits their working habits, the fact that there is more cement and that it is wetter than would be the case for a semi-dry mix, there is more risk of accidental staining. Consequently, a higher degree of care is needed when working with a moist mix mortar. However, for the less experienced, moist mix seems to be the easiest option of the three, and this should not be overlooked.
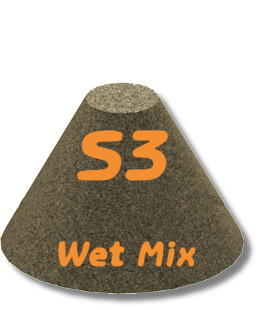
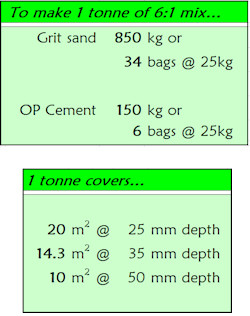
A wet mix is wet. It has the same consistency as a bricklaying mortar, and following on from above regarding water/cement ratio, an even higher cement content is normally used. An exceptionally hard mortar is not required, so there is no overriding need to use a Class II equivalent (which would be 4:1): 6:1 will be ample.
However, because this mortar is based on a grit sand, which is much more free-draining than a building sand, it can be quite difficult to make a workable mortar, that is, one that doesn't lose its water content and become overly stiff. For this reason, a plasticiser is usually added to a wet mix.
Plasticisers help break down surface tension and keep the water trapped in the mortar while it is being used. For the same reason, some contractors, as mentioned, like to add a spadeful or two of building sand, to improve the workability. However, as stated above, a building sand makes a weaker mortar, and so using a plasticiser is preferred to adding an inferior sand.
A wet mortar is fluid. It flows and moves when loaded and while this makes it very easy to press the flag down to the correct level, with the excess mortar being squeezed out at the edges. It also means that, when the next flag is laid, some of that flag’s excess mortar can be pushed back under the preceding flag, upsetting its previously accurate level. This is the ‘floating’ problem - wet mortars move and flow all too easily, and that ease of movement can adversely affect flags laid previously. It takes a substantial degree of skill (and patience) to watch for problems with adjacent units being lifted, shifted or re-aligned when working with a wet mortar bed.

And as before, this is a very wet cement mix, so even more care is required to avoid accidental staining.
General notes:
For the cement-bound mixes described above, the compressive strength of the bedding mortar is not always the most important consideration. With only 30-50mm depth, a mortar with a high compressive strenth hasn't the thickness to withstand exceptionally heavy loads. Instead, what matters most is the fact that the mortars will set and provide a firm and stable support for the paving above.
For commercial flag paving (paving in public areas) and for paving that will be subject to vehicular overrun (including driveways), the strength of the bond formed between bed and flag, and between the bed and the substrate, is often the most important factor. This bond restricts lateral slippage within the rigid structure of the pavement. Where a flexible structure has been used (non-cementitious bed), lateral slippage is checked by means of the robust edge courses.
However, for many forms of patio paving, there is no absolute requirement that the paving units should adhere to the mortar (or vice-versa). The one exception is cobbles (NOT setts) which need to be held firmly in place by a combination of bedding and jointing. While a bond between bedding and paving can be advantageous at free edges , it offers no great benefit at restrained edges or within the body of the paving, and it can actually render remedial work far more awkward as attempts to lift the paving units free from the pavement brings up the bedding too.
Picture Framing
Wet mix beds are also associated with a problem known as "picture framing". This phenomenon normally only comes to light some days after completion of the paving, and some flags are more prone to it than others. However, it is the presence of mortared joints that seems to be the common denominator in its appearance, especially when those joints were filled using a wet mortar or a wet cementitious slurry grout.
Basically, what happens is that some of the cement is taken up and transported by the generous water content within the mortar. Some of this cement-contaminated water is absorbed by the flags and carried through capillaries within the flag. The flags tend to be dry and therefore they ‘suck up’ water from the wet mortar brd and joint (a process known as 'wicking').

At the same time, evaporation is driving off moisture from the edges and the surface of the flags. Evaporation takes place even on coolish, overcast days - it’s not limited to the height of summer. This evaporation creates a ‘transport chain’ within the body of the flag, with cement-laden water being drawn in at the underside and joint faces, and then being evaporated away at the upper surface, and, particularly, at the edges of the flag. Just one problem: cement does not evaporate. The water is driven off, but it can’t take its particulate cementitious passengers with it, so they get left behind, and because they’ve been hydrated by the water that brought them to this position, they cure, harden and leave a stain.
Although picture framing can, and does, occur with flags laid on other bedding materials, most cases are seen on flags that are porous or permeable, that have mortared joints, and that have been laid on a full bed of high slump mortar or concrete.
This phenomenon is particularly noticeable around the edges of the flag, and so that’s how it acquired its name - the resulting stain often looks like a picture frame around the flag.
Lime Mortars
A century ago, lime mortars were the mortar of choice. At that time the building trade hadn’t become obsessed with portland cement, and every town of any significance had a limekiln, where limestone that may have been shipped in from a hundred miles away, would be burnt and crushed and slaked to form a lime suitable for mortar production.
Lime mortars are softer and more flexible than cement mortars, and this makes them eminently suitable as a bedding mortar, especially for specialist applications, such as the laying of reclaimed materials, cobbles and, as we are beginning to re-discover, stone paving. There is massive potential for lime-based bedding mortars in the coming years, and although they are the exception, rather than the rule, at the moment, the laying industry, and the pre-batched mortars industry, are expecting demand to grow in the coming years as familiarity spreads and the benefits become more apparent.
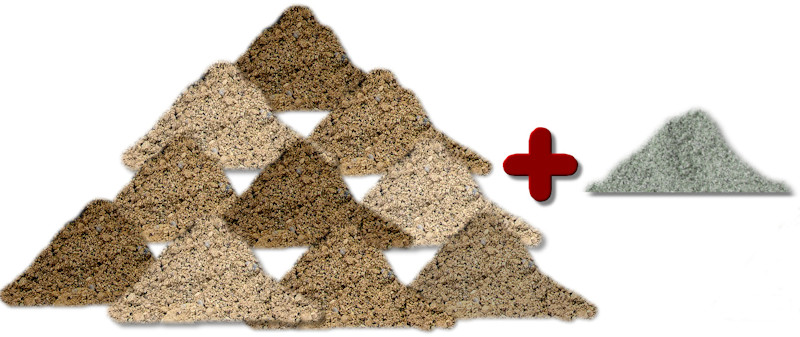
For bedding, a typical lime mortar mix would be close to that for a Class V mortar , roughly 1 part cement to 3 parts lime and 10 parts grit sand. This would work best as a moist mix, and should give 2-6 hours working time,depending on the time of year and the weather conditions.