Nomenclature
Steps consist of a sequence of Risers and Treads, as illustrated opposite. In some instances, particularly on internal building work, a step may have a nosing and the horizontal distance between nosings is referred to as the going .
A riser of less than 75mm is more of a 'trip' than a 'step', and anything greater than 225mm is a bit of a challenge. Document M of the Building Regs recommends an ideal of 150mm to 170mm. The tread should be as wide as practicable, but never less than 280mm; personally, we design steps with a minimum tread of 300mm, although 450mm is much more comfortable for users.
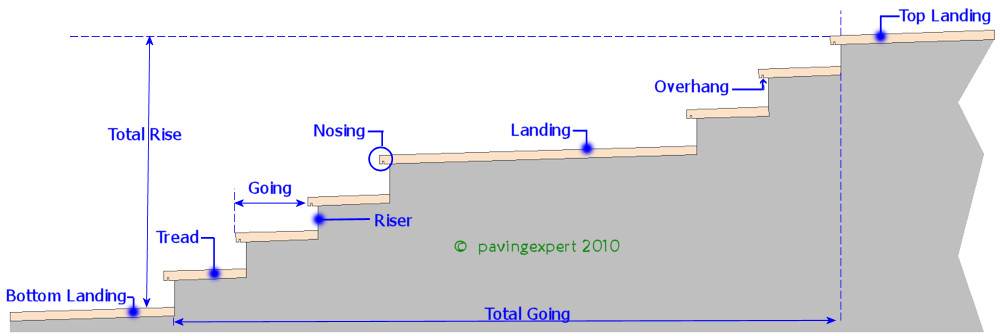
There is some confusion regarding maximum step height in Britain. I suspect this arises from there being different guidance issued for internal stairs, which can apparently go up to 220mm, and external steps, which, if we assume the guidance provided in Document M of the Building Regs is the one we should be following, then it's a maximum of 170mm....
....or is it?
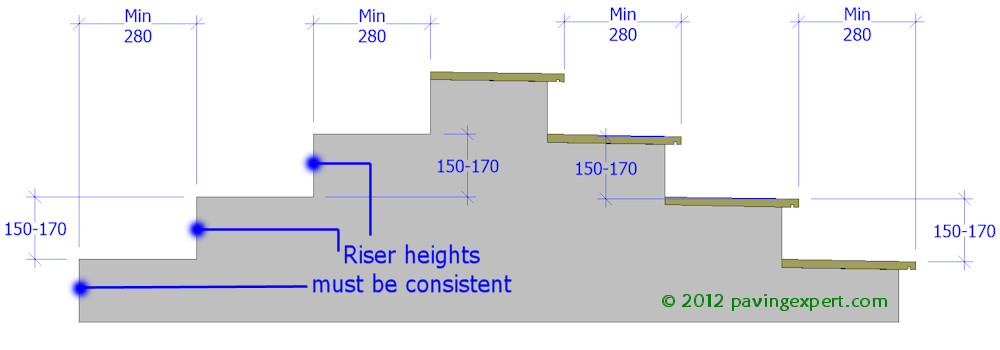
When designing steps, it is important to ensure that the dimensions of treads and risers are regular, ie that each step has a rise of x mm and a tread of y mm. Larger flights of steps can benefit by the inclusion of extended treads, known as Landings , which offer a safe resting stop for the non-mountaineers among us.
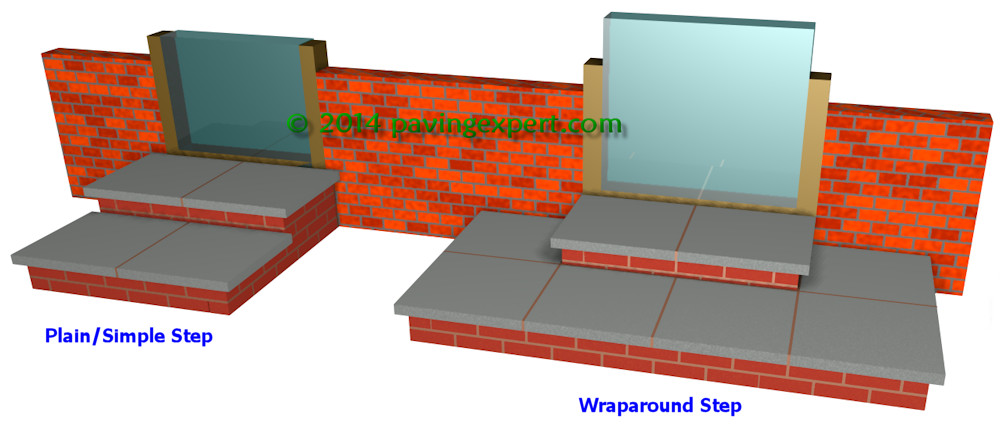
For most situations, there are two common layouts for a flight of steps, as shown above. The plain step maintains a constant width, whereas the wraparound step is more pyramidal, with one or both sides of the flight increasing in width as the steps descends.
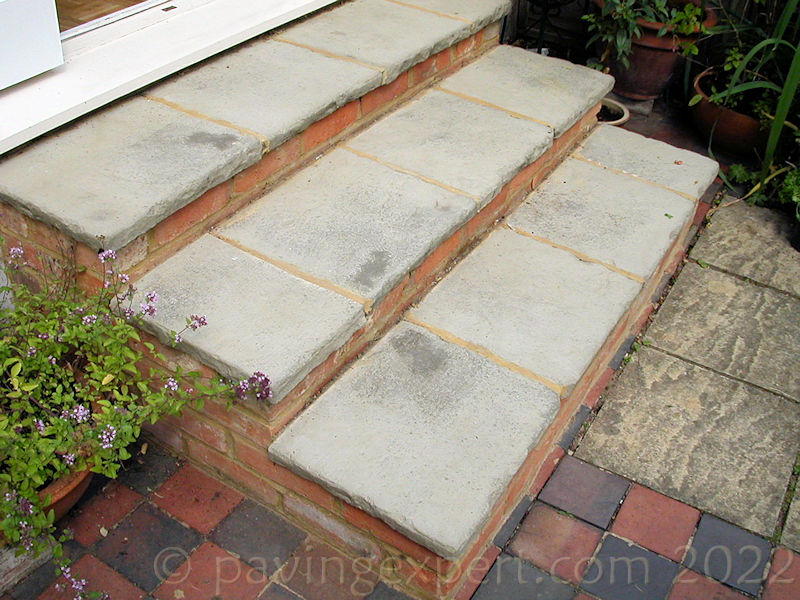
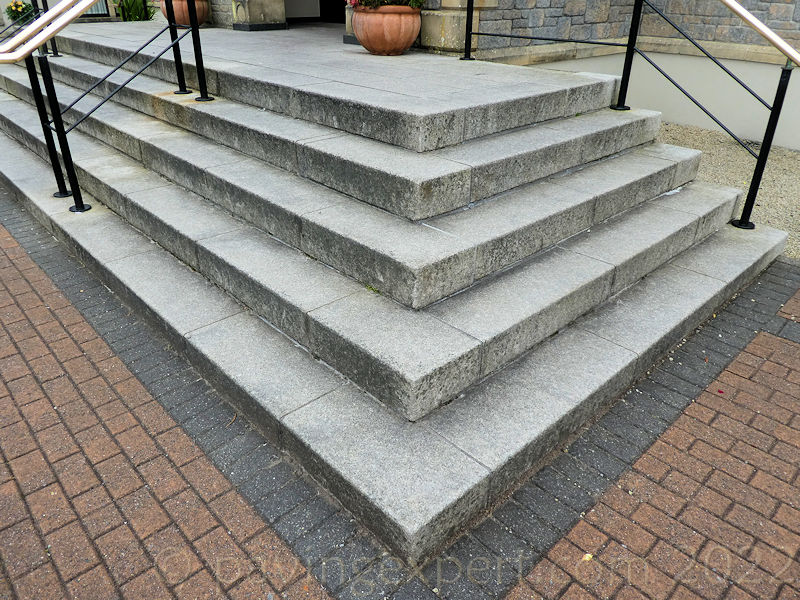

A steep or extensive flight of steps, such as these old granite steps in a city centre, will nearly always require a handrail. Wrought iron, as shown here is rarely used nowadays. Galvanised steel tubing is the preferred material for use with most brick, block, flagstone or concrete steps and they are best fabricated at a local light-engineering company to suit the site dimensions. Timber steps may incorporate a timber handrail.
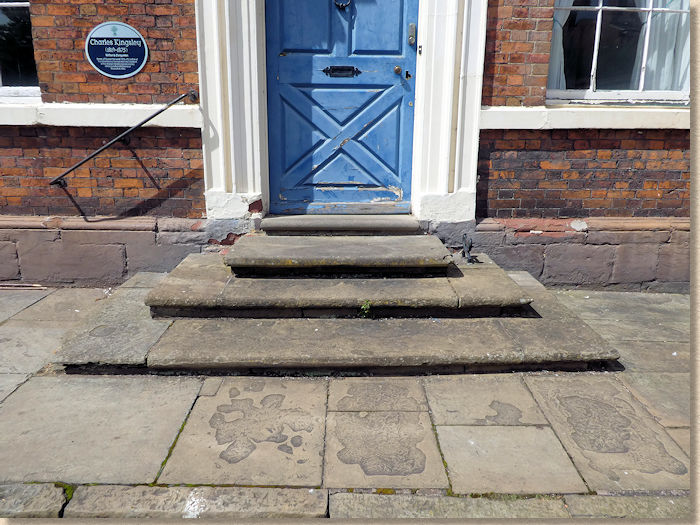
Flag and Brick Doorsteps
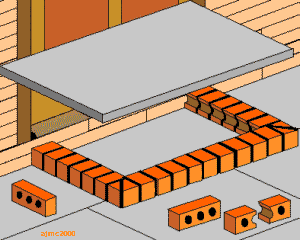
This is one of the simplest steps to build. The riser is formed from Class B engineering bricks snapped in half and bedded on a Class II mortar over the existing paving. The bricks should be laid out so that they will leave a minimum 25mm overhang on the tread, which is formed using a 900x600x50mm pcc flag, bedded onto more mortar.
Of course, the engineering bricks may be replaced with walling blocks or one of the artificial stone blocks, or even with housebricks, as long as they are suitably frost-proof .
The tread can be constructed from almost any flag/slab available, although the thin 32-35mm units are not really strong enough to bridge a gap of more than 300mm, so extra supports should be used to carry the centre of the unit.
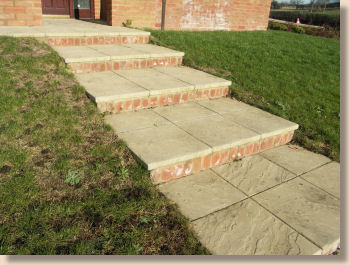

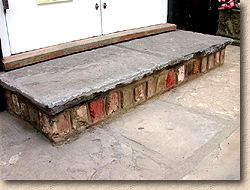
The steps in these photographs have been built using reclaimed bricks and reclaimed Yorkstone flags . On the left, a standard square step constructed using a couple of flags to form the tread, while on the right, the flags have been cut into a semi-circle with the aid of a power saw .

It is important that there is some fall on the tread, to direct water away from the doorway and to prevent any ponding on the step where, if the surface water were to freeze during winter, it would present a real danger to users. A fall of 1:80 is usually regarded as a minimum, so, a 600mm wide step should have at least 8mm of fall, preferably 10-12mm.
This method of construction can be developed to construct wider steps when needed, or multiple steps for where a larger rise needs to be accommodated. The brickwork is best constructed on a concrete strip footing , but it may also be constructed on top of an existing pavement, provided that the paving is firm and stable, preferably on a cementitious bed over a sub-base. If in doubt, use a strip footing.
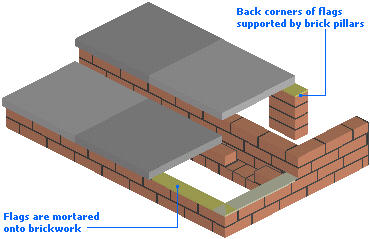
The flags must be mortared onto the brickwork to prevent them moving or slipping, and the back corners should be supported by additional brickwork, or brick pillars as shown in the diagram. The use of a SBR-improved mortar is recommended as this offers extra adhesion and radically reduces the chance of the tread units becoming loose.
See Secure Fixing below.....
Breaching the Damp Proof Course
A common query, since setting up this site, has been the potential risk of creating problems with rising damp if the step rises above the damp proof course (dpc) to tie-in with internal floor level. In 99% of situations, a 'hollow' step of this type represents no real threat, as the amount of brickwork in direct contact with the wall of a property is minimal. A solid step, ie, one cast in concrete, or where the 'hollow' is filled with a concrete or other fill material, can be isolated by incorporating some form of a damp barrier between the step and the wall. A drainage composite , waffle board, or a plastic/vinyl barrier is suitable, and can be sealed onto the external face of the masonry with a silicone or polysulphide mastic sealant, if considered necessary.
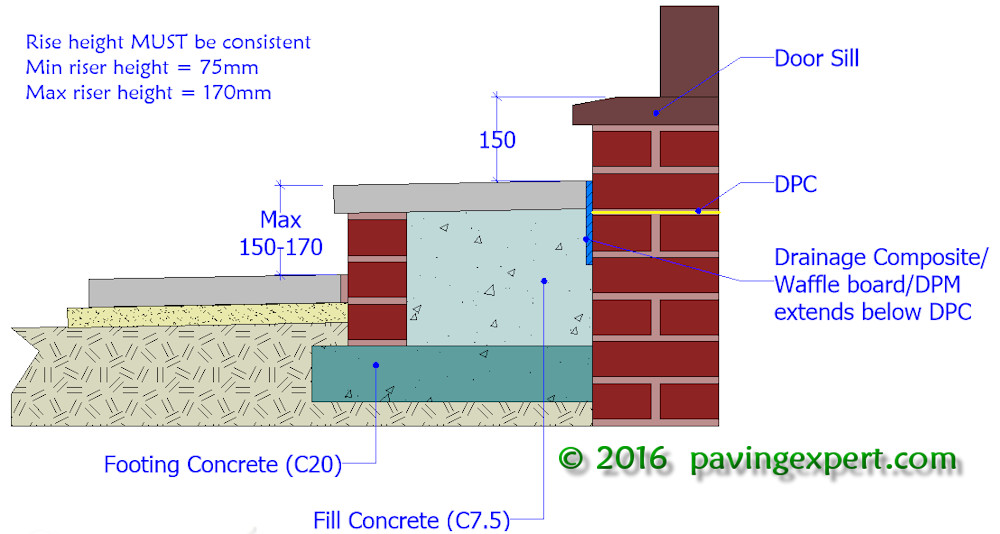
Increasingly, slot or threshold drains are being used at the interface between the uppermost tread of the step and the masonry or sill of a doorway.
For more information on DPCs and paving/drainage, see the Dealing with DPCs page.
Secure fixing of treads
On steps where a flagstone or similar is used as the tread and there is an overhang or 'corbelling' of the tread, it is imperative that the tread is securely fixed to the main structure of the step. When a user puts their weight on the leading edge or nosing of the tread, there is significant force exerted, lever-like, to lift the tread from its bed, and so the bond between tread and bed, and between bed and structure, must be sound.
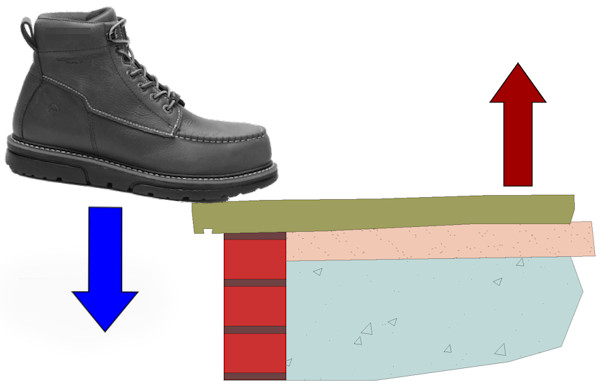
This technique is also very useful for fixing pool edge copings or other pavings at vulnerable, exposed edges - it ensures there is much less rtisk of them coming loose.
There is often a temptation for installers to use either a mortar with a higher cement content, say a 3:1 mix in place of a 6:1 mix, to use PVA as an alleged bonding agent, or to combine a cement-rich mortar with PVA and hope for the best. Adding cement to a mortar does not, in very general terms, improve its adhesive properties, and PVA, being water-soluble, is a sort-term fix that will eventually be washed away.
However, by using a Bond Bridge slurry primer, the adhesion between tread and bed is more or less certain and permanent. A simple bond bridge primer daubed onto the underside of the tread unit prior to bedding will significantly improve its ability to withstand the cantilever forces of someone placing their weight on the leading edge. Combining a bond bridge with the use of an SBR-enhanced mortar as the bed for the tread gives even more solidity. And for maximum adhesion, a secondary bond bridge coat could be used between the step sub-structure and the mortar bed.
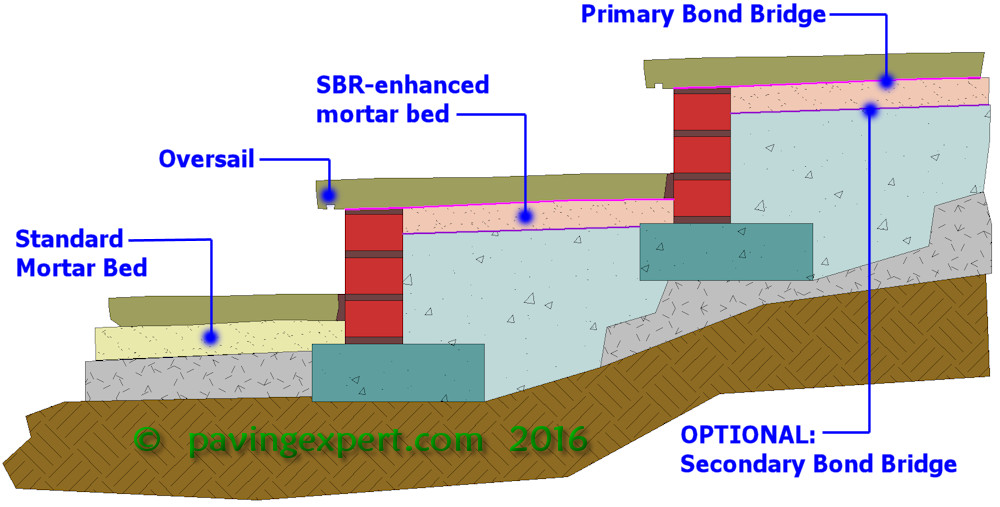
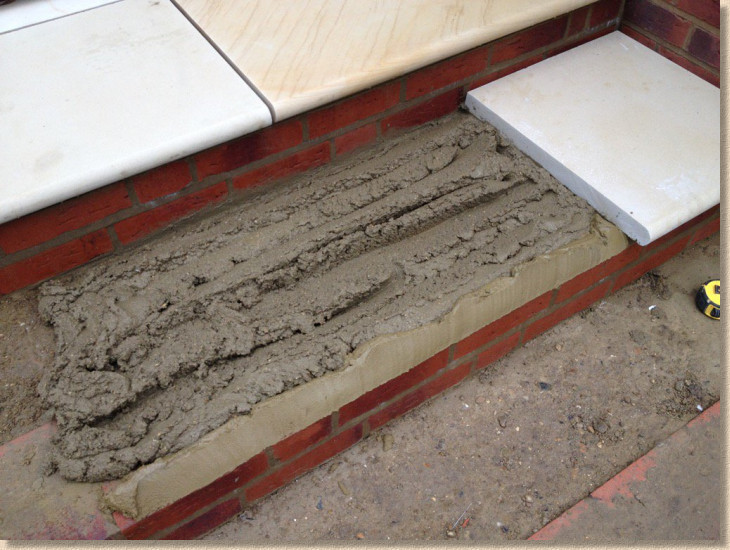
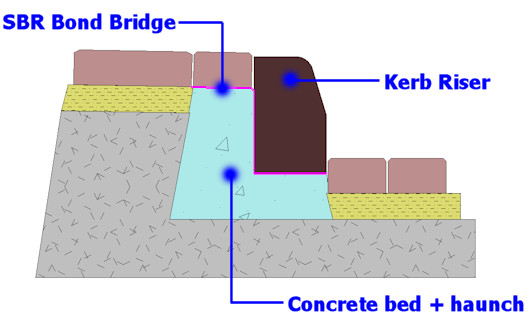
This technique can also be used on steps where there is no overhang, that is, a flush riser, or where the riser unit itself forms part of the tread. By securely fixing the tread, no matter what type of step is being constructed, the overall safety of the structure is significantly improved.
Flights of steps
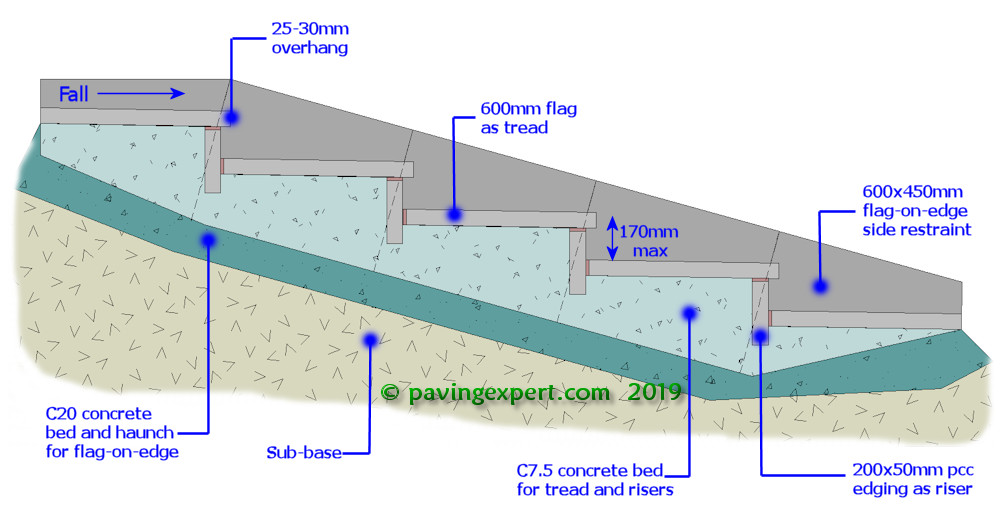
For a flight of steps, the flag and brick step illustrated opposite is one of the simplest constructions, and is commonly used on motorway embankments for access to lighting and traffic control equipment.
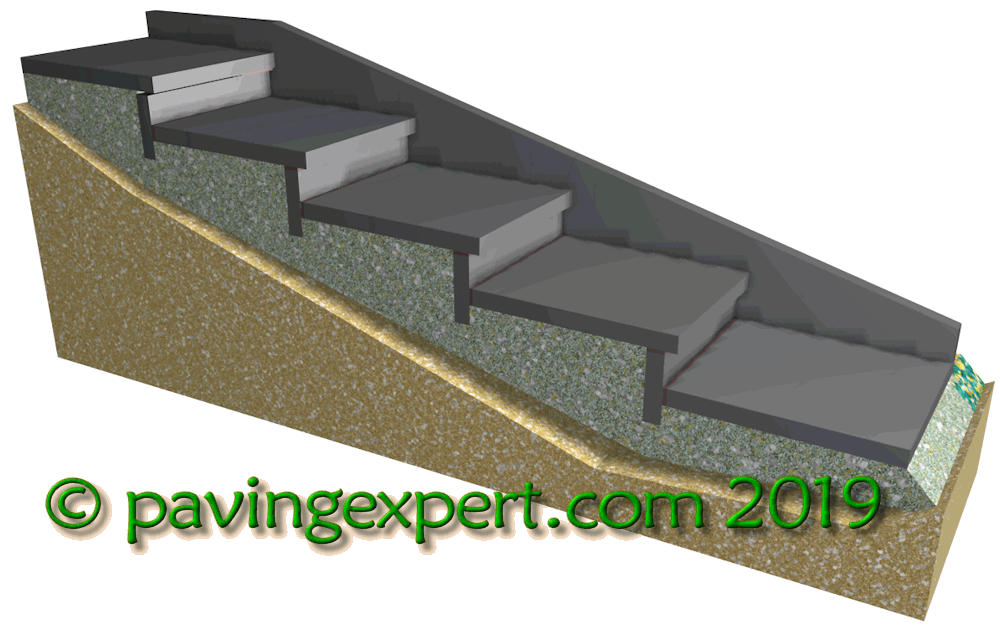
The bank is dug off to a profile roughly 300mm below finished level. Class B engineering bricks are bedded onto a semi-dry concrete, about 100mm thick, so that 2 full courses (150mm) show above the top of the preceding flag, which should slope gently to prevent water hanging on the tread. The next flag can then be mortared into position, allowing a 25-50mm overhang. This sequence continues until the flight is complete.
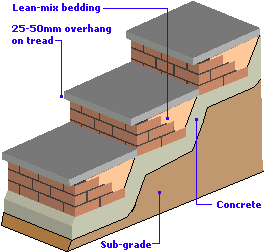

The drawing above illustrates a flight of steps using 600x600mm flags/slabs as the tread, although any size flag/slab could be used. We prefer to design these steps so they are at least 900mm wide, as shown in the photograph of a completed flight of steps, rather than 600mm wide as shown in the diagram.
Also note in the photograph the use of a landing halfway up the flight, and the provision of a handrail. The earth bank to either side of the steps has been held back by laying a 'flag-on-edge' against the steps. This helps prevent earth and/or vegetation spilling over onto the treads.
Where wider flights are required, or when a particular type of flag is being used as part of an overall paving scheme, the riser may be constructed from a suitable kerb or edging kerb . The actual construction is not too dissimilar to the flag and brick construction considered above, except the courses of brickwork are replaced with a single edging kerb.


The flags used as treads MUST be securely fixed so that there is no danger of slippage. This is normally achieved by using a bond bridge to ensure firm adhesion to a bed comprising a wet mix concrete or Class 1 mortar laid over the concrete bedding. As long as there is good adhesion between the flags and the bedding, there should be no problem.
Brick
Bricks have a long tradition of use in the construction of steps and most of the clay paver ranges available from the leading manufacturers include the basic component units to enable the construction of steps using their standard pavers. Some manufacturers include many more special bricks within their ranges that are suitable for step construction.
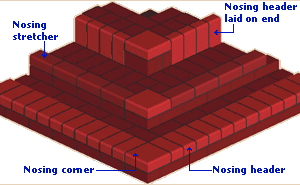
The diagram opposite illustrates the main brick units used in step construction, featuring a bull-nosed edge. Other styles and colours are available, but, as with bricks in general, there are far too many to list here. Consult the manufacturers for fuller detail.
Brick-built steps are constructed using standard bricklaying skills . The bricks are normally laid on a solid concrete base or footing, the joints are mortared, and the interior may be filled with common brickwork or with mass concrete.
Custom Built Brick Steps

This series of photos depicts what is one of the best-looking flights of steps we've ever constructed to a private house. The elevated interior floor level, combined with a driveway that slopes away from the house somewhat dramatically and the tight working area posed a considerable challenge.
Thanks to Brian & Lorrainne for having faith in our vision.The risers are 200x100x65 bull-nosed step stretchers, in a Stafford Blue/Brown, and laid upright rather than flat. The treads are formed from Marshalls Nori Clay Cobbles, 56x56x65mm in Sherbourne Red with Rushmere Brown diamond detailing to the top step and a broken pencil band to the edge of each step. The whole step is constructed on a mass concrete sub-structure, with the lower steps, fading to zero as the drive level rises.


The extra-wide top step ensures that callers don't feel uncomfortable or vertiginous, and the organic shape of the whole structure blends into the garden. The materials were chosen not just for the vibrancy of their colours, but because they blend with the existing Accrington Stock brick of the house, lookiing to be almost part of the original structure, rather than a modern add-on.
Block Paving Steps
Unlike the flag-on-brick step illustrated above, which can be built on top of the existing paving, the steps normally built with block paving are constructed on the sub-base. The kerb units are laid on a bed and haunch of concrete and then extra sub-base material is placed and compacted inside the step to elevate the levels. The sketch opposite shows a typical cross-section.

Fuller construction details and diagrams for this type of step are given on the separate Block Paving Steps page.
The remainder of this section comprises a series of photographs of steps we've built over the past 5 years to complement block paving works. The principles involved in construction are the same as outlined above, it's just the materials that differ, but the smaller unit sizes allow much greater creativity than is possible with flags and bricks.
Squared Step

Squared step built with large 'half-battered' profile block-paving kerb units with special external corner blocks. There is a considerable difference between existing ground level and internal floor level on this property, which has been resolved by elevating the paving by means of a small retainer wall, and the use of a large single step to provide access from the kitchen door.

See this type of step being built - Feature Step Case Study
Curved Step
S-shaped step built with half-battered block-paving kerb units. The tight curves have resulted in wide joints at the front of the kerb-units, which have been pointed with a matching coloured mortar. Radial kerb-units would have resulted in a tidier job, had they been available at the time of these works.

Double Step

Double step to front door. The elevated floor level of this property required a step of more than one riser, and its position at the main entrance to the house demanded something attractive, but functional. The large upper step (radius 750mm) provides ample space to stand, to deposit bags while searching for keys and prevents users from feeling unsteady or precipitous when ringing the bell.
Decorative Step
Fancy step to conservatory door. No step was actually required at this threshold, but the client liked the idea of a step into the conservatory, as a finishing touch to the patio. The risers have been constructed with 125mm high kerb-units, giving a lift of only 100mm, less than the recommended minimum, but a 150mm riser would have made the step level with internal floor level. The tread is constructed from block paving, with textured flag insets, to match the patio and to make it just a bit more special.

Construction of Block Paving Steps
Other Materials
Stone
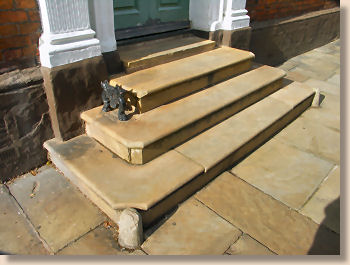
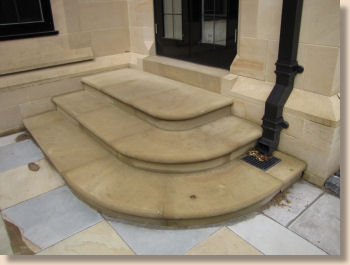
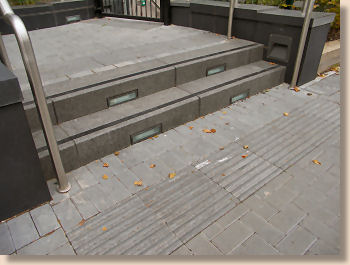
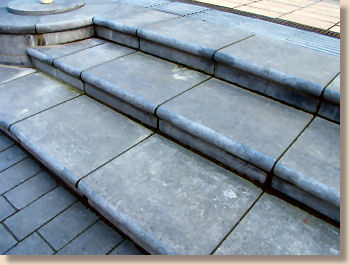
Although flags, bricks and block paving units are the most common materials used for the construction of steps, alternatives are sometimes specified. Dressed stone is a popular choice as a step-building material. It's often used on older buildings or where a more imposing look is required, such as on important civic and corporate buildings and landscapes. Granite in various hues is probably the most commonly specified stone, because it's incredibly hard-wearing and decorative, but sandstone, yorkstone, limestone, whinstone or portland stone (a form of limestone) may also be used, as well as other rock types.
A typical stone step relies on a single unit, a large block of stone that acts as both tread and riser. These blocks of stone may be bedded on concrete, on brickwork or on other blocks of stone to create the flight. However, some stone steps will rely on separate units of stone to create the risers and treads.
Stone steps used for buildings and other public areas are normally finely dressed, honed and/or polished to give a safe, smooth yet tractable surface. Some feature marvellously fine detailing, such as inlays of other, contrasting stones, corporate logos, bull-nosing etc. However, steps for less formal sites may be rough-dressed, or simply formed from convenient flattish rocks found in the area (fieldstones).

Timber
Timber is normally used only for temporary steps or for access to a timber deck , where flags, stone or brick would be impractical. Timber is a versatile and cheap material and is much easier to work than flags or stone, but it has a couple of major flaws when it comes to step construction: it rots and it becomes slippy when wet.
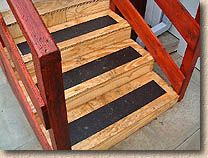
However, for short-term or temporary use, a custom built set of steps in timber can be an adequate solution. The steps are easily fabricated in almost any exterior grade timber or ply material, and sized to suit the site. Traction strips or anti-slip paint can be applied to the treads to combat the risk of slipping.
Occasionally, on garden or landscaping projects, reclaimed railway sleepers may be used to construct simple steps.
Concrete
Concrete steps come in two forms - pre-fabricated and cast-in-situ.
Pre-fabricated steps are manufactured elsewhere and then positioned on site. They may be cast at a specialist facility or fabricated in a more convenient location on the site and then lifted into position. Almost all pre-fabricated concrete structures incorporate reinforcing steel and some structural units will be pre-stressed. The pre-cast steps may be supplied as integral units combining a number of steps in a single monolithic flight, or as individual units for assembly on site. Some firms specialise in construction of modular pre-cast stair and step components.
Cast-in-situ concrete is generally used only when no other solution is viable.
Cast-in-situ requires often intricate formwork to support the concrete during the curing process, and it is usual to leave the soffit forms (formwork supporting the undersurface of a deck or any overhang) in place for 21 days or so, rendering cast-in-situ not only costly, but time-consuming too, and not popular in today's "fast track" construction industry. A further complication of c-i-s is that any faults or defects in the casting may only become apparent after the formwork is struck and the structure is in place, whereas, with pre-cast, faults and defects can be identified before the units are positioned.
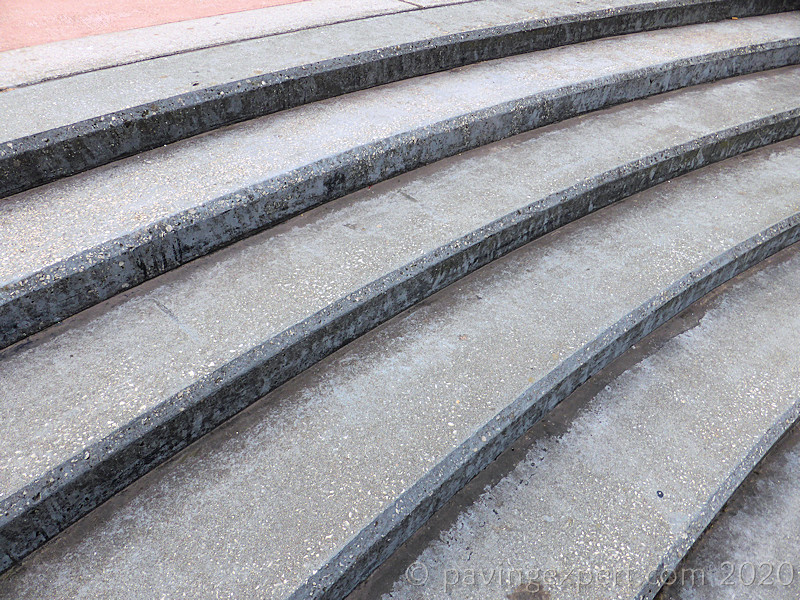
However, c-i-s can be useful for one-off constructions where pre-cast would not be justified, such as when forming part of a larger c-i-s structure, or when accommodating undefined situations.
